Honey Sriracha Fried Chicken Sandwiches
Honey Sriracha Fried Chicken Sandwiches – Crispy, Spicy & Sweet Perfection
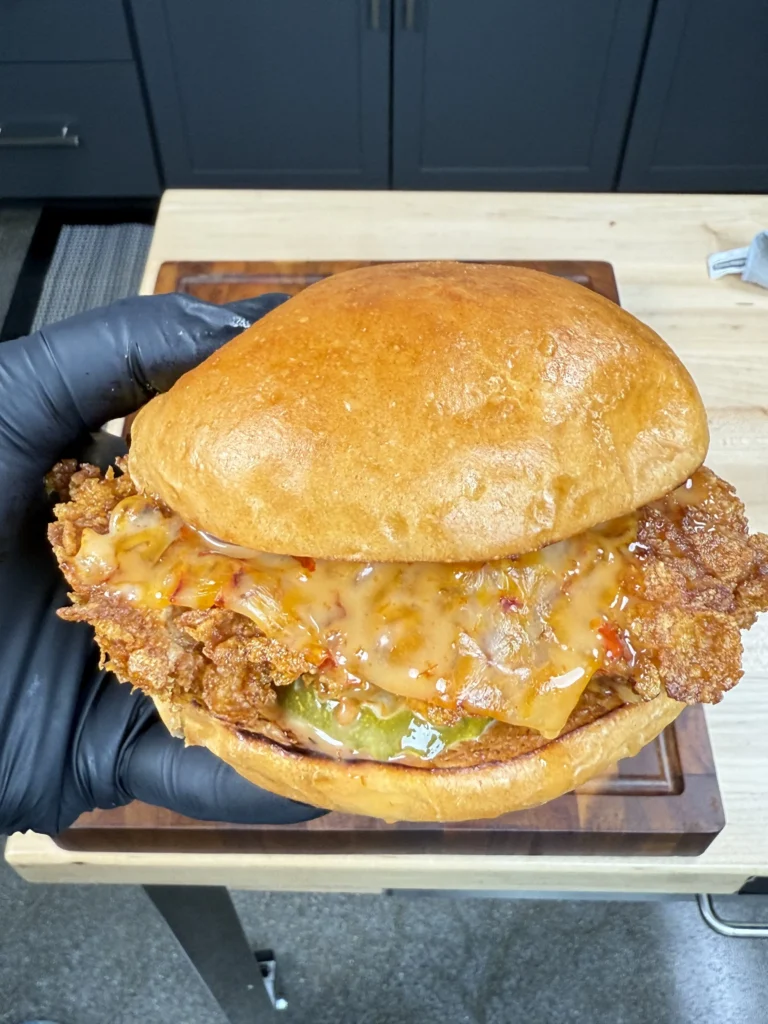
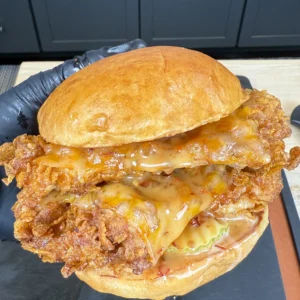
Craving something spicy, sweet, crispy, and absolutely addictive? These Honey Sriracha Fried Chicken Sandwiches deliver the perfect balance of heat, crunch, and sticky glaze that combines the best of Nashville hot chicken with an Asian-inspired twist. Think Chick-fil-A meets gourmet with a honey-sriracha combo that creates layers of complex flavor in every bite. Perfect for game day gatherings, summer cookouts, or weekend indulgence, these sandwiches feature buttermilk-marinated chicken that’s double-breaded for maximum crispiness, then glazed with a sweet and spicy sauce that caramelizes beautifully. The result is a restaurant-quality sandwich that’s packed with bold flavors and delivers those viral-worthy visuals that will have everyone asking for the recipe.
Mastering the Double-Breading Technique for Ultimate Crispiness
The secret to achieving restaurant-quality spicy fried chicken lies in understanding the science behind the double-breading technique and proper oil temperature control. The combination of all-purpose flour and cornstarch in the breading mixture creates the perfect texture. Flour provides structure and browning while cornstarch adds exceptional crispiness and helps the coating stay crunchy longer.
The buttermilk marinade serves multiple purposes: its acidity tenderizes the chicken proteins, while the thick consistency helps the breading adhere better during frying. The key is maintaining oil temperature between 350-375°F throughout the cooking process, which creates immediate surface sealing that locks in moisture while developing the golden, crispy exterior. Allowing the breaded chicken to rest for 10 minutes before frying is crucial. This resting period allows the coating to bind properly with the chicken surface, preventing the breading from falling off during cooking. The cornstarch creates a lighter, more delicate crunch compared to traditional all-flour coatings, while the strategic seasoning blend in both the marinade and breading ensures flavor penetrates throughout the chicken rather than just sitting on the surface.
Creating the Perfect Honey Sriracha Glaze and Flavor Balance
The honey sriracha glaze represents the perfect marriage of sweet, spicy, and umami flavors that elevates these spicy chicken sandwiches from good to extraordinary. Honey provides natural sweetness and helps the glaze caramelize on the hot chicken, while sriracha brings heat and depth with its garlic and chili pepper base. The addition of soy sauce introduces umami richness that complements both the honey and sriracha, creating a more complex flavor profile than simple sweet-and-spicy combinations.
Rice vinegar adds crucial acidity that brightens the glaze and prevents it from becoming overly sweet, while butter provides richness and helps the glaze achieve the perfect consistency for coating. The glaze should be applied while the chicken is still hot from frying. This allows the sauce to penetrate slightly into the crispy coating while caramelizing on the surface. The key is simmering the glaze just until it thickens slightly, about 2-3 minutes, which concentrates the flavors without making it too thick or sticky. Optional red pepper flakes can be added for extra heat, and the glaze can be customized by adjusting the honey-to-sriracha ratio based on personal heat preferences.
Assembly Techniques and Serving Suggestions for Maximum Impact
Strategic assembly and thoughtful accompaniments transform these fried spicy chicken sandwiches from simple comfort food into a memorable dining experience. Using brioche buns provides the ideal foundation – their slight sweetness complements the honey glaze while their sturdy structure holds up to the substantial filling without falling apart. Toasting the buns with butter adds extra flavor and creates a moisture barrier that prevents sogginess from the glazed chicken.
The placement of pickles or jalapeños provides essential acidity and crunch that cuts through the richness of the fried chicken and balances the sweet glaze. Spicy mayo or garlic aioli adds creaminess while amplifying the heat level for those who want extra kick. Asian-style slaw offers textural contrast and freshness, though traditional lettuce works well for a simpler approach. For variations, chicken thighs provide more flavor and stay juicier than breasts, though either works well when pounded to even thickness. The marinade time can range from 1-4 hours, with longer marination producing more tender, flavorful results. These sandwiches pair excellently with crispy seasoned fries, sweet potato wedges, or grilled corn for a complete meal that satisfies every craving.
Spicy Chicken Sandwich Ingredients
- 4 boneless skinless chicken thighs or breasts (pounded to even thickness)
- 1 cup buttermilk
- 1 tablespoon hot sauce
- 1 teaspoon garlic powder
- 1 teaspoon onion powder
- 1 teaspoon smoked paprika
- 1 teaspoon kosher salt
- ½ teaspoon black pepper
Breading:
- 1½ cups all-purpose flour
- ½ cup cornstarch (for extra crunch)
- 1 teaspoon paprika
- ½ teaspoon cayenne pepper
- 1 teaspoon garlic powder
- Salt and pepper to taste
For Frying:
- 3-4 cups vegetable oil or peanut oil for frying
Honey Sriracha Glaze:
- ¼ cup honey
- 3 tablespoons sriracha
- 1 tablespoon soy sauce
- 1 tablespoon unsalted butter
- 1 teaspoon rice vinegar
- Pinch of red pepper flakes (optional)
For Assembly:
- 4 brioche buns
- Pickles or jalapeños (for tang and crunch)
- Spicy mayo or garlic aioli
- Asian slaw or shredded lettuce (optional)
Detailed Step-by-Step Instructions
Step 1: Marinate the Chicken for Maximum Flavor and Tenderness
Begin by preparing the buttermilk marinade that will transform ordinary chicken into incredibly tender, flavorful meat. In a large mixing bowl, whisk together 1 cup of buttermilk, 1 tablespoon of hot sauce, 1 teaspoon each of garlic powder, onion powder, and smoked paprika, plus 1 teaspoon of kosher salt and ½ teaspoon of black pepper until all ingredients are completely combined. The buttermilk’s acidity works to break down tough protein fibers while the spices penetrate deep into the meat for comprehensive flavor development. If using chicken breasts, pound them to an even ¾-inch thickness using a meat mallet or rolling pin to ensure uniform cooking – place the chicken between plastic wrap or in a sealed bag to prevent splattering.
Add the chicken pieces to the marinade, ensuring each piece is completely submerged and coated on all sides. Turn the chicken several times to guarantee even coverage, then cover the bowl tightly with plastic wrap or transfer everything to a sealed zip-top bag. Refrigerate for at least 1 hour, though 2-4 hours produces even better results as the longer marination time allows for deeper flavor penetration and enhanced tenderness. The chicken will appear slightly whitened from the buttermilk’s acids, which indicates the tenderizing process is working effectively.
Step 2: Prepare the Double-Breading Station and Dredge the Chicken
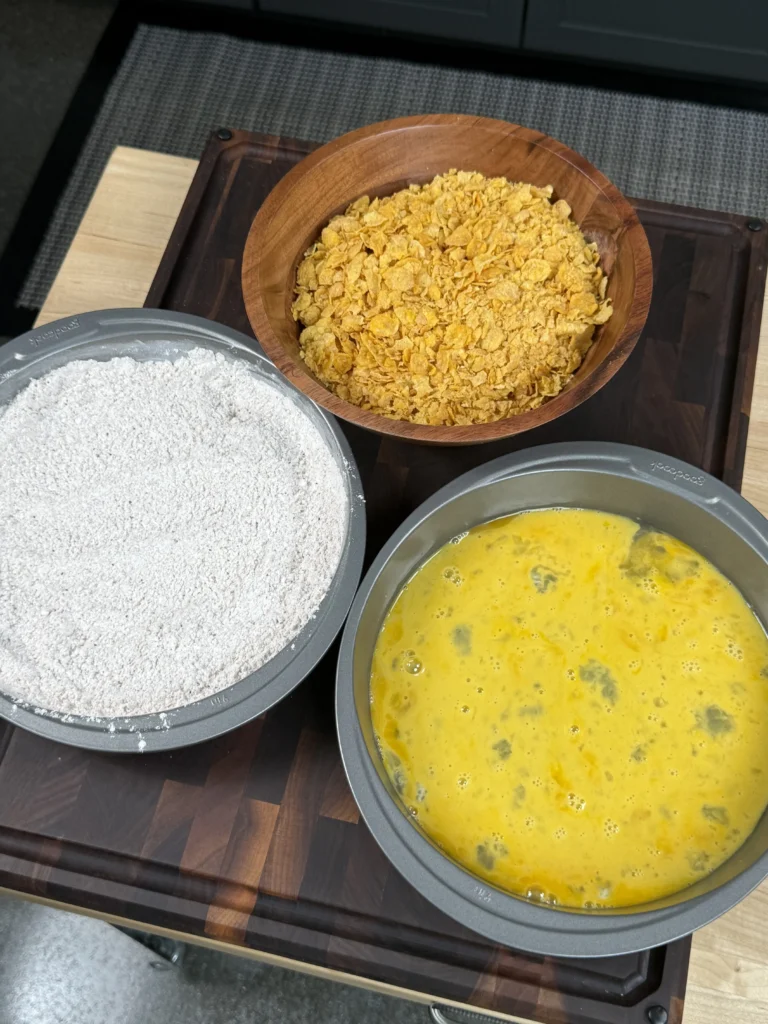
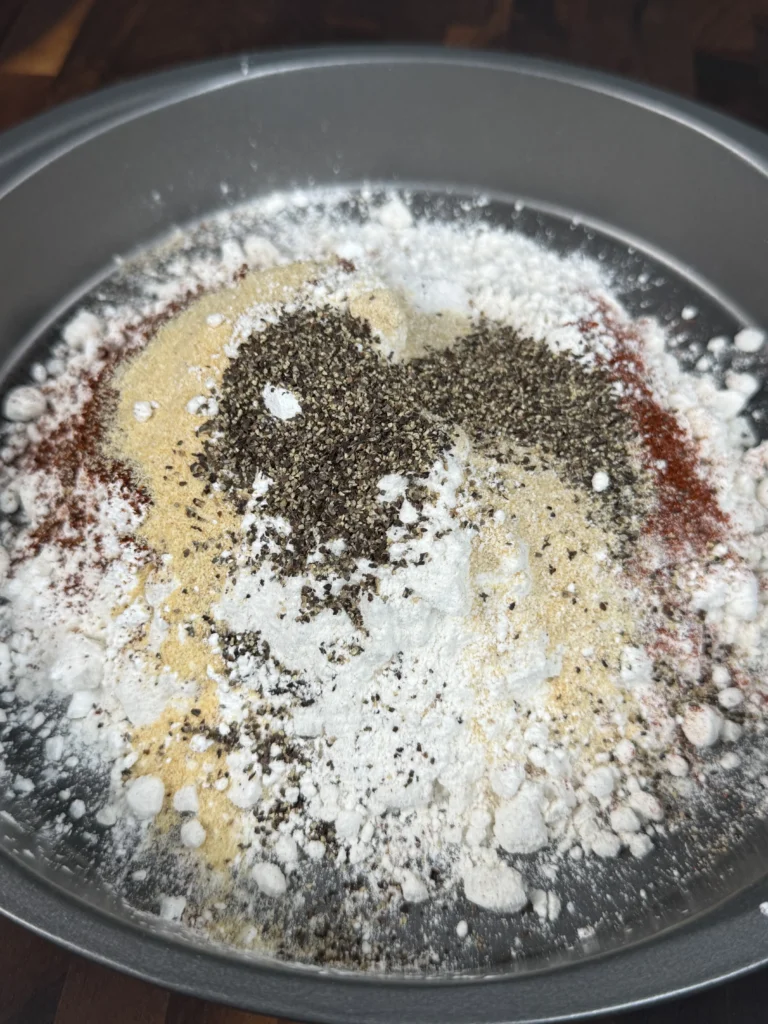
Remove the marinated chicken from the refrigerator about 15 minutes before cooking to allow it to come closer to room temperature for more even frying. In a shallow dish or pie plate, thoroughly combine 1½ cups of all-purpose flour, ½ cup of cornstarch, 1 teaspoon of paprika, ½ teaspoon of cayenne pepper, 1 teaspoon of garlic powder, and salt and pepper to taste. Whisk the dry ingredients together until evenly distributed – the cornstarch is crucial for achieving exceptional crispiness and helping the coating stay crunchy longer after frying. Set up a wire cooling rack over a baking sheet near your breading station for holding the coated chicken.
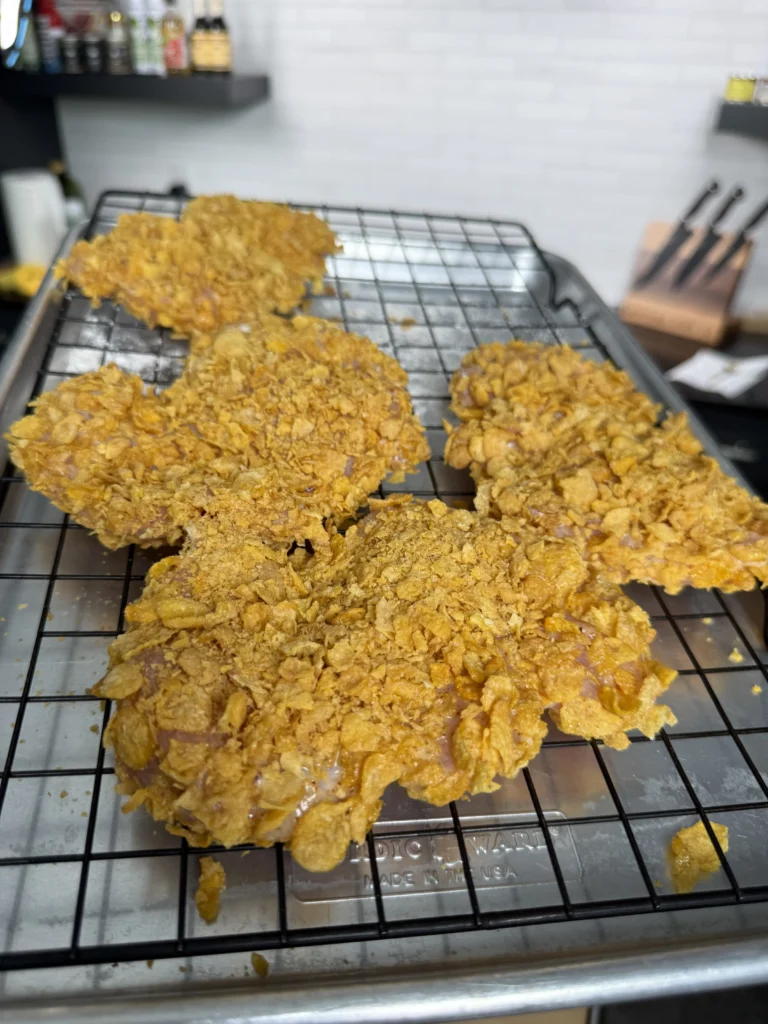
Remove each piece of chicken from the marinade, allowing excess buttermilk to drip off but leaving the chicken slightly wet, which helps the flour mixture adhere properly. Dredge each piece thoroughly in the seasoned flour mixture, pressing firmly with your hands to ensure the coating sticks well and gets into all the crevices. For extra thick coating, you can dip the floured chicken back into the remaining marinade and dredge again. Place the breaded chicken pieces on the wire rack and let them rest for exactly 10 minutes – this crucial step allows the coating to bind with the chicken surface and prevents the breading from falling off during frying.
Step 3: Heat Oil and Fry the Chicken to Golden Perfection
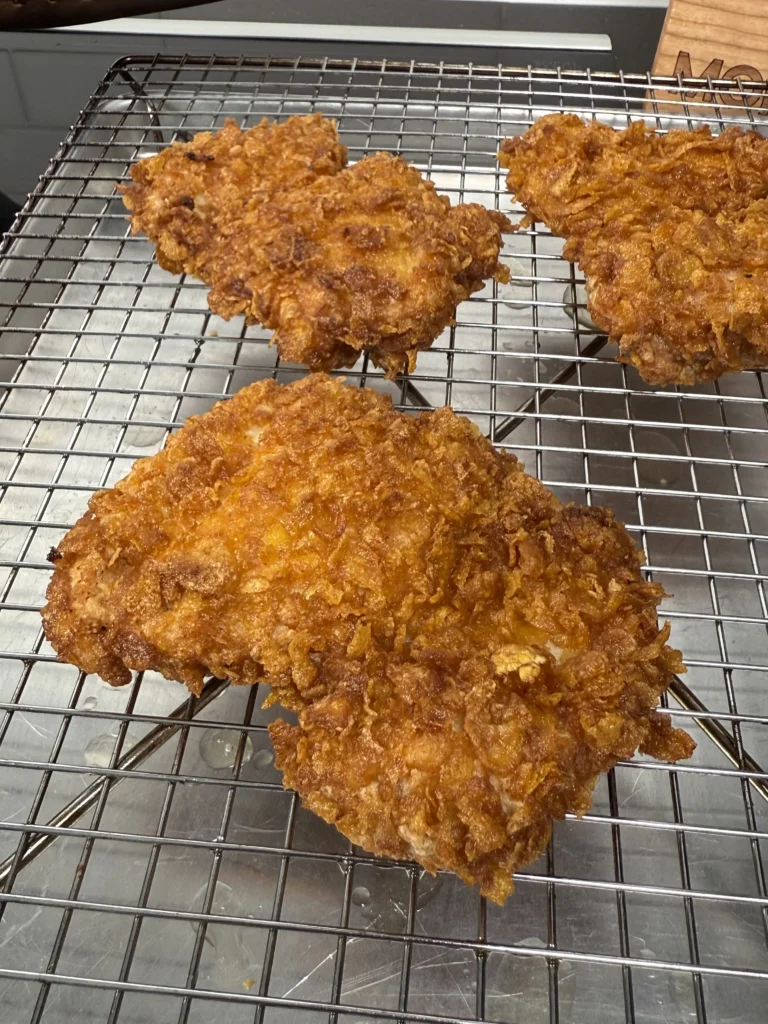
While the breaded chicken rests, heat 3-4 cups of vegetable oil or peanut oil in a heavy-bottomed Dutch oven or deep skillet to exactly 350-375°F, using a candy thermometer or instant-read thermometer to monitor temperature accurately. The oil depth should be at least 2 inches to allow for proper circulation around the chicken pieces. Maintaining proper oil temperature is critical. If it’s too low and the chicken will absorb excess oil and become greasy, too high and the exterior will burn before the interior cooks through.
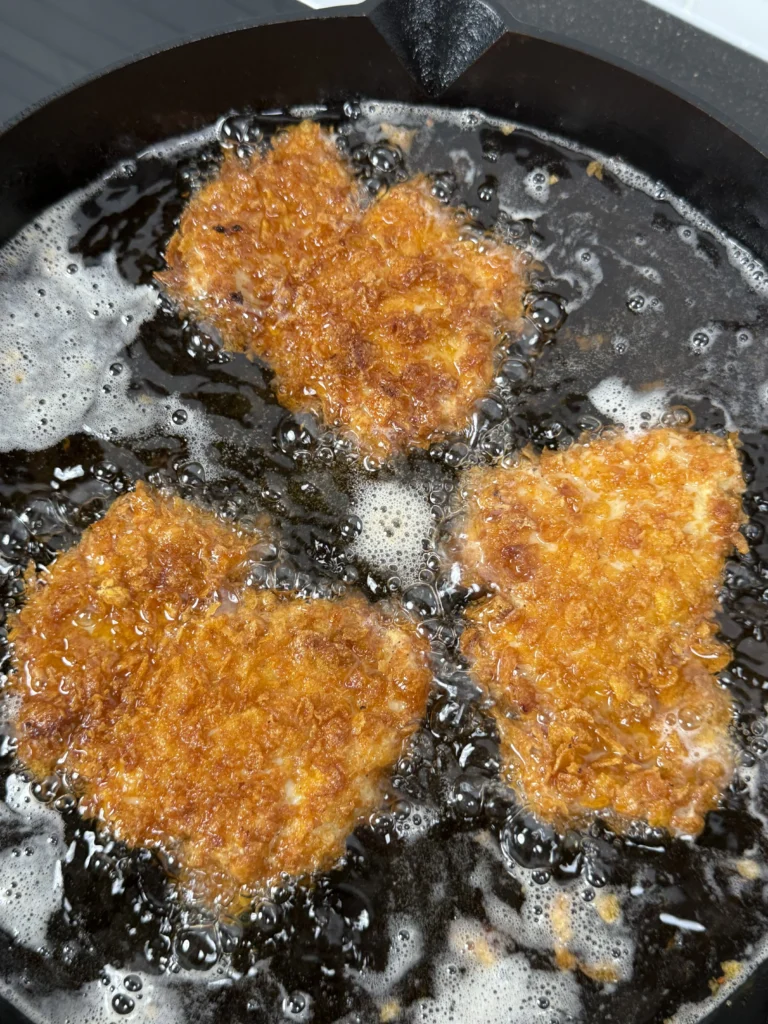
Test the oil temperature by dropping a small piece of the flour mixture into the oil; it should sizzle immediately and float to the surface. Carefully lower the chicken pieces into the hot oil using tongs, working in batches to avoid overcrowding which would drop the oil temperature significantly. Fry each piece for 5-6 minutes per side, turning once, until the exterior is deep golden brown and the internal temperature reaches 165°F when measured with an instant-read thermometer inserted into the thickest part. The chicken should float when fully cooked and sound hollow when tapped gently with tongs. Remove the fried chicken to a clean wire rack set over paper towels to drain excess oil, and immediately proceed to glazing while the chicken is still hot for best adhesion and flavor.
Step 4: Create the Honey Sriracha Glaze and Apply While Hot
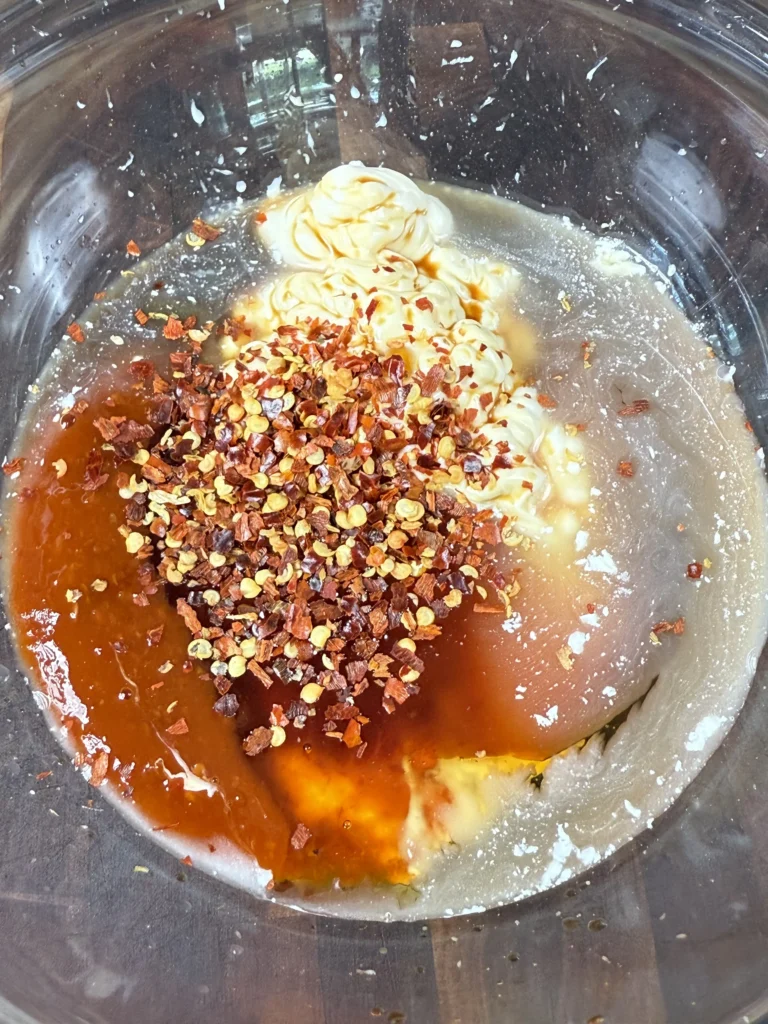
While the chicken finishes frying, prepare the signature honey sriracha glaze that will elevate these sandwiches to restaurant quality. In a small saucepan over medium heat, combine ¼ cup of honey, 3 tablespoons of sriracha, 1 tablespoon of soy sauce, 1 tablespoon of unsalted butter, and 1 teaspoon of rice vinegar. Whisk the ingredients together constantly as they heat, ensuring the butter melts completely and all components are well incorporated. Bring the mixture to a gentle simmer and cook for 2-3 minutes, whisking frequently, until the glaze thickens slightly and becomes glossy. It should coat the back of a spoon but still be thin enough to brush or drizzle easily.
Taste and adjust the balance if needed: add more honey for sweetness, sriracha for heat, or rice vinegar for brightness. Remove from heat and add a pinch of red pepper flakes if desired for extra heat and visual appeal. Immediately brush or drizzle the hot glaze generously over the freshly fried chicken while it’s still on the cooling rack – the heat from the chicken will help the glaze penetrate slightly into the crispy coating while caramelizing on the surface. Reserve some glaze for serving if desired, but the majority should be applied while the chicken is hot for maximum flavor impact and beautiful appearance.
Step 5: Toast the Buns and Prepare Assembly Components
While the glazed chicken rests briefly, prepare the remaining sandwich components for optimal assembly. Slice the brioche buns in half horizontally and brush the cut surfaces lightly with softened butter for enhanced flavor and browning. Toast the buns cut-side down in a large skillet over medium heat or on a griddle until golden brown and slightly crispy, about 2-3 minutes. This creates a moisture barrier that prevents the buns from becoming soggy from the glazed chicken.
If using spicy mayo, prepare it by mixing mayonnaise with a small amount of sriracha, garlic powder, and a squeeze of lime juice to taste. Slice pickles or jalapeños thinly for optimal distribution and crunch. If using Asian slaw, ensure it’s well-drained to prevent excess moisture, or pat shredded lettuce dry with paper towels. Have all components within easy reach for quick assembly while the chicken is still warm. The toasted buns should be golden and fragrant, with a slight crispness that will hold up well to the substantial filling without becoming soggy during eating.
Step 6: Assemble the Spicy Chicken Sandwiches
Working quickly while the chicken is still warm and the glaze is glossy, begin assembling the sandwiches for optimal flavor and structural integrity. Spread a lot of spicy mayo or garlic aioli on both the top and bottom bun halves. Place 3-4 pickle slices or jalapeño rings on the bottom bun half, arranging them evenly to provide acidity and crunch in every bite.These elements are crucial for cutting through the richness of the fried chicken and balancing the sweet glaze.
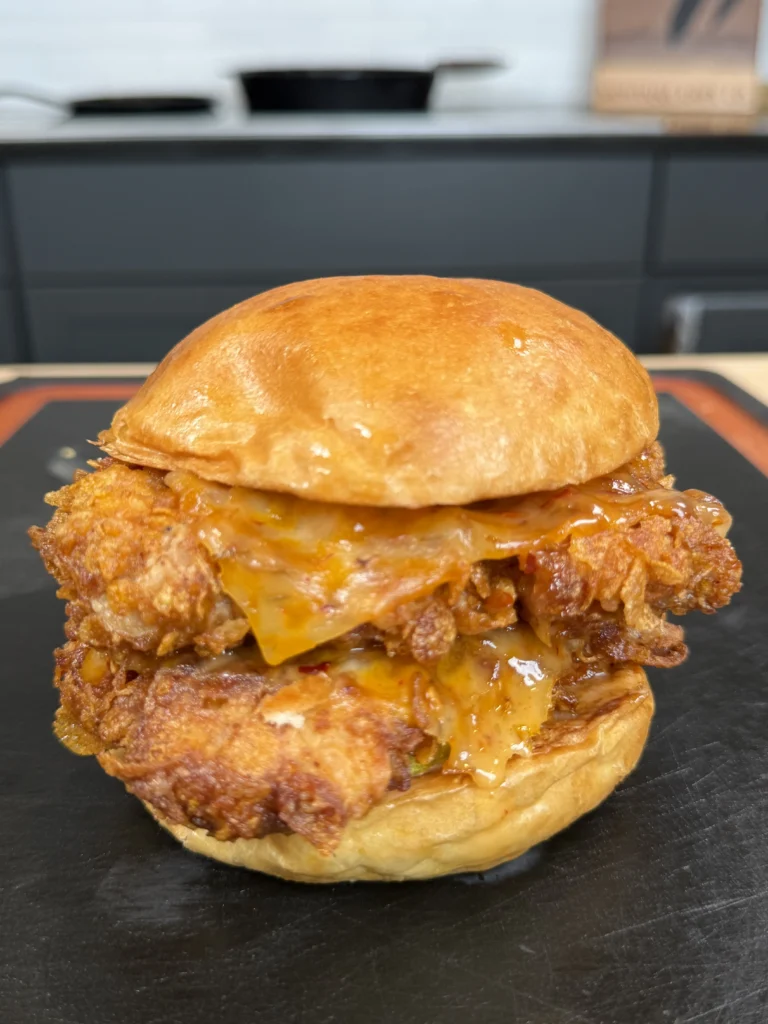
Add a small handful of Asian slaw or lettuce for freshness and textural contrast, being careful not to overload the sandwich. Carefully place the glazed fried chicken on top of the vegetables, positioning it evenly so the sandwich will be balanced when eaten. The glaze should still be slightly warm and glossy, creating an appetizing appearance that showcases the sweet-spicy coating. Crown with the top bun half and gently press down to compress the sandwich slightly, helping all components adhere together. Serve immediately while the chicken is still warm and the contrasts between hot, crispy chicken and cool, crunchy vegetables are at their peak. Provide extra napkins and consider serving with additional glaze on the side for those who want extra flavor.
Honey Sriracha Fried Chicken Sandwiches – Crispy, Spicy & Sweet Perfection
Ingredients
- 4 boneless skinless chicken thighs or breasts pounded to even thickness
- 1 cup buttermilk
- 1 tablespoon hot sauce
- 1 teaspoon garlic powder
- 1 teaspoon onion powder
- 1 teaspoon smoked paprika
- 1 teaspoon kosher salt
- ½ teaspoon black pepper
- 1½ cups all-purpose flour
- ½ cup cornstarch
- 1 teaspoon paprika
- ½ teaspoon cayenne pepper
- 1 teaspoon garlic powder for breading
- Salt and pepper to taste
- 3-4 cups vegetable oil for frying
- ¼ cup honey
- 3 tablespoons sriracha
- 1 tablespoon soy sauce
- 1 tablespoon unsalted butter
- 1 teaspoon rice vinegar
- 4 brioche buns
- Pickles or jalapeños
- Spicy mayo or garlic aioli
Instructions
- Whisk together buttermilk, hot sauce, and spices. Marinate chicken 1-4 hours refrigerated.
- Mix flour, cornstarch, and seasonings. Dredge chicken, pressing firmly. Rest 10 minutes on wire rack.
- Heat oil to 350-375°F. Fry chicken 5-6 minutes per side until golden and 165°F internal temperature.
- Simmer honey, sriracha, soy sauce, butter, and vinegar 2-3 minutes until thickened. Brush over hot chicken.
- Toast brioche buns with butter until golden. Prepare mayo and vegetables.
- Assemble: mayo on both buns, pickles on bottom, add glazed chicken, vegetables, and top bun. Serve immediately.
Notes
Apply glaze while chicken is hot for best adhesion
Can marinate up to 4 hours for maximum flavor
Oil temperature is crucial – use thermometer
Conclusion
These Honey Sriracha Fried Chicken Sandwiches represent the perfect fusion of crispy comfort food and bold Asian-inspired flavors. The combination of buttermilk-marinated chicken, double-breading technique, and that honey sriracha glaze creates layers of flavor and texture that rival any restaurant.
Want more recipes like this spicy chicken sandwich? Check out all of our grilling recipes here for more steak, seafood, and BBQ favorites that are perfect for your next cookout.
Looking for Something specific? Click a category below!
ITEMS USED IN THIS RECIPE
Hasty Bake Charcoal Grill and Smoker
Upgrade Your Meat Game with Grill Nation x Linz Heritage Angus
If you really want to take your grilling and cooking to the next level, you need to check out our collaboration with Linz Heritage Angus. We’ve partnered with them to bring you some of the best beef you can get your hands on.
Linz Heritage Angus isn’t your typical grocery store meat. These guys are the real deal – they raise their cattle the right way, and you can taste the difference in every bite. We’re talking about beef that’s been dry-aged to perfection, with marbling that makes your mouth water just looking at it.
Check out these premium cuts that’ll change how you think about beef:
- Premium Ribeye Steaks – Perfect for special occasions
- Dry-Aged Beef Selection – Take your grilling to the next level
- Ground Beef & Burger Blends – The foundation of great BBQ
Use code GN15 at checkout for 15% off your first or