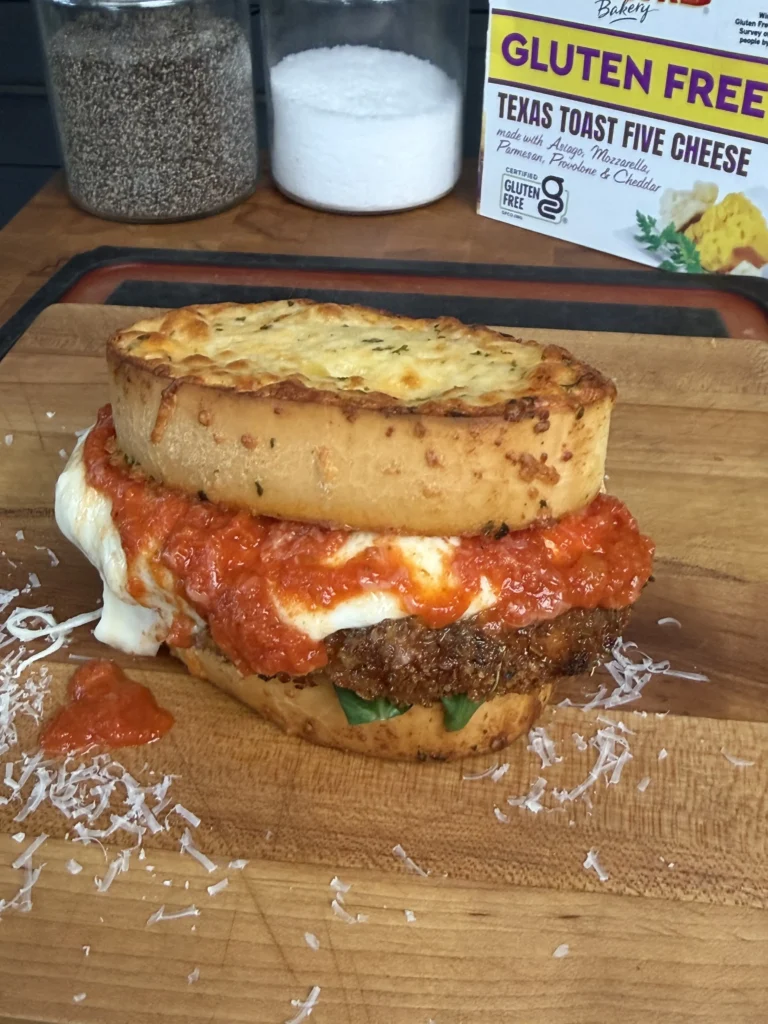
Ultimate Chicken Parmesan Sandwich Recipe
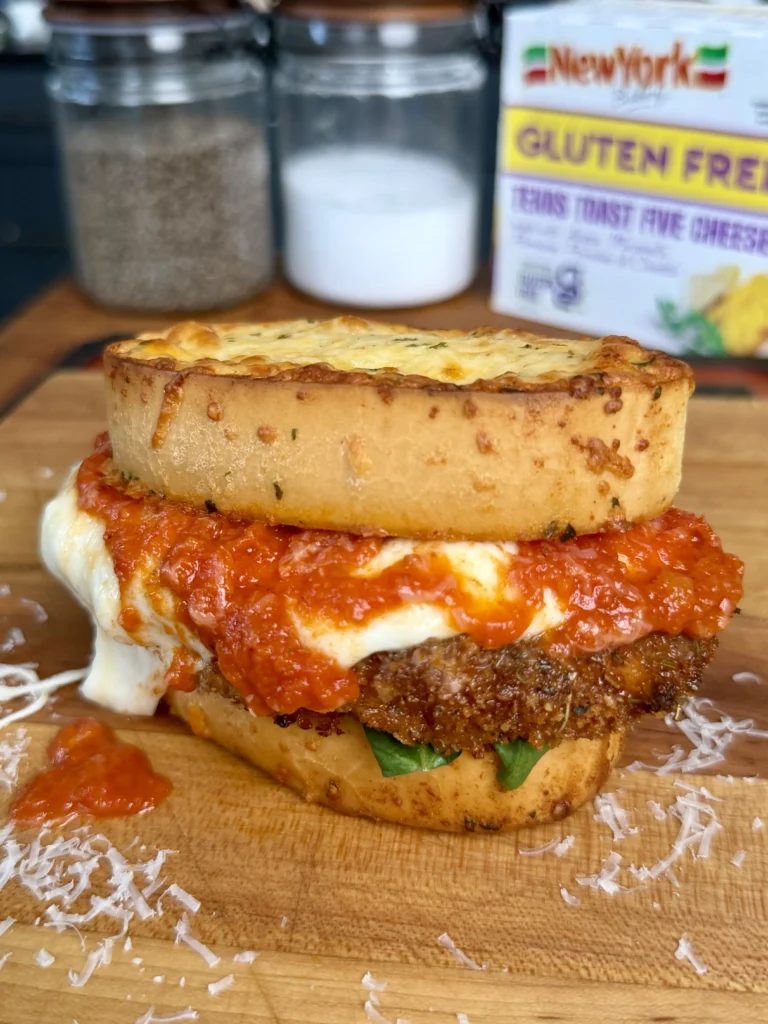
Chicken parmesan sandwich is a classic Italian-American comfort food featuring crispy breaded chicken cutlets pan-fried until golden brown, topped with rich marinara sauce and melted mozzarella cheese, then sandwiched between toasted Italian bread. The chicken gets pounded thin for even cooking, coated in a three-step breading process with Parmesan-spiked breadcrumbs, and fried in hot oil until the exterior develops that signature crunchy crust. You layer the hot chicken with sauce and cheese, then broil just long enough to melt everything into gooey perfection while keeping the breading crisp underneath. The toasted, buttered bread holds up against the sauce without getting soggy, creating the perfect balance of textures in every bite. This crispy chicken parm sandwich delivers restaurant-quality results at home with bold Italian flavors and that satisfying crunch.
The whole process takes about 35 minutes from start to finish, including breading setup, frying, and assembly. You slice chicken breasts horizontally to create thin cutlets, bread them in seasoned crumbs mixed with Parmesan, fry them in 350°F oil for 6 to 8 minutes total, then build the sandwiches with marinara and mozzarella before a quick broil. The technique keeps the chicken juicy inside while maintaining that crucial crispy coating, even after you add the sauce. These fried chicken parmesan sandwiches are perfect for weeknight dinners, game day spreads, or any time you want bold Italian-American flavors without leaving home.
Why Adding Parmesan to the Breadcrumbs Makes the Crust Better
Mixing grated Parmesan directly into your breadcrumb coating creates a more flavorful and structurally superior crust compared to plain breadcrumbs alone. The cheese adds umami depth and a nutty, savory quality that complements the Italian seasonings in the breading. More importantly, Parmesan contains proteins and fats that help the coating brown faster and more evenly during frying, developing that deep golden color you see in restaurant chicken parm.
The cheese also impacts texture in a significant way. As Parmesan melts during frying, it essentially acts as an additional binder within the breading layer, helping everything adhere to the chicken more securely. This means less breading falling off when you flip the cutlets or when you bite into the finished sandwich. The fat content in the cheese contributes to a richer, more complex crunch that stays crispy longer than breadcrumbs alone.
You want to use freshly grated Parmesan rather than the pre-shredded kind, which contains anti-caking agents that can interfere with proper adhesion. Grate it on the smaller holes of a box grater so it integrates evenly throughout the breadcrumbs. Plan on about ½ cup of Parmesan for every 1½ cups of breadcrumbs to get that ideal ratio of cheese flavor without making the coating greasy.
Some cooks skip this step and just sprinkle Parmesan on top after cooking, but that misses the structural benefits the cheese provides during the frying process. The difference in both flavor and texture is immediately noticeable when you take that first bite.
How to Keep Breaded Chicken Crispy Under Sauce
The biggest challenge with any chicken parmesan sandwich is maintaining that crispy breading after you add marinara sauce and cheese. The solution involves multiple techniques working together, starting with how you fry the chicken and ending with how you assemble the sandwich.
First, proper frying technique is critical. You need to maintain oil temperature at 350°F throughout the cooking process. When oil temperature drops below 325°F, the breading absorbs more oil and becomes greasy rather than crisp. Use a thermometer to monitor the temperature and fry only 2 cutlets at a time to prevent overcrowding, which causes temperature drops. The hot oil creates steam that pushes outward from the chicken, keeping oil from penetrating the breading and creating that light, crunchy texture.
Second, drain the fried chicken on a wire rack instead of paper towels. Paper towels trap steam underneath the cutlets, which softens the bottom crust. A wire rack allows air circulation on all sides, keeping the entire surface crispy. Let the chicken rest for 2 to 3 minutes on the rack before adding sauce.
Third, control your sauce application. You want to spoon marinara over the chicken rather than drowning it. Use about ¼ cup of sauce per cutlet, focusing on the center and leaving the edges exposed. This creates pockets where the breading stays completely dry and crispy. The sauce should accent the chicken, not cover every inch of it.
Fourth, add the cheese and broil quickly. The brief exposure to high heat under the broiler melts the cheese without giving the sauce time to soak through the breading. You’re looking at 1 to 2 minutes maximum under a hot broiler. The cheese melts and bubbles while the exposed edges of the breading stay dry and crunchy.
Finally, assemble and serve immediately.
Should You Use Fresh or Low-Moisture Mozzarella for Chicken Parm Sandwiches
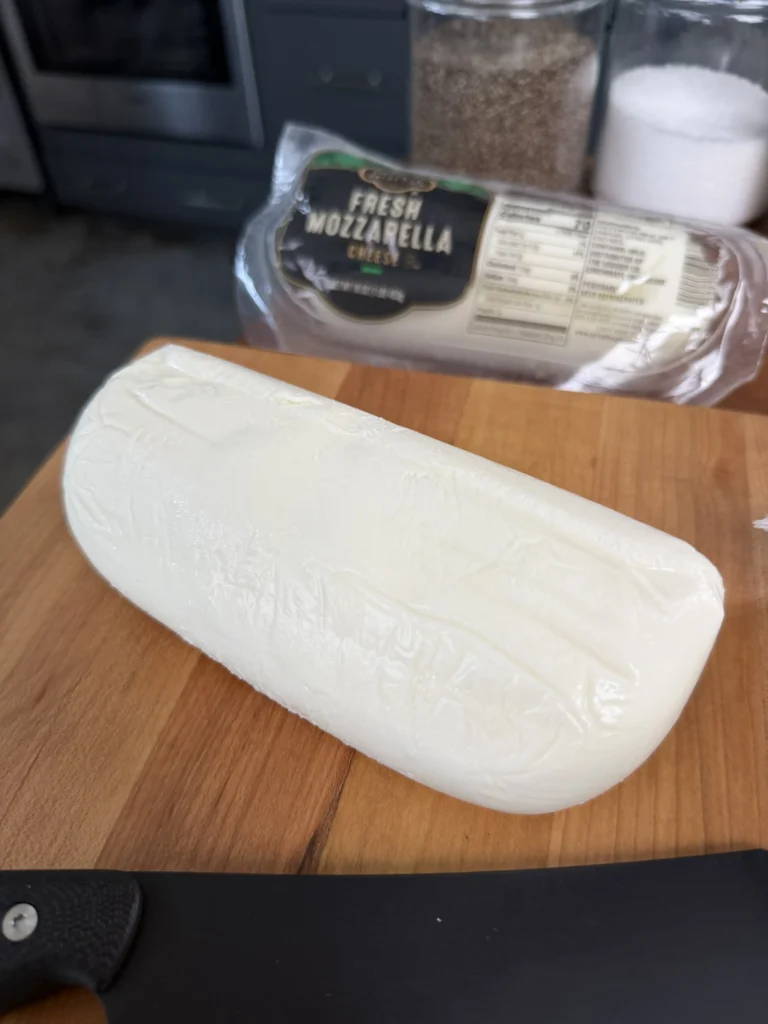
Low-moisture mozzarella is the better choice for chicken parmesan sandwiches because it melts properly without releasing excess water that can make your bread soggy. Fresh mozzarella, the kind packed in water or brine, contains significantly more moisture that gets released during heating. When that water hits your bread, it creates sogginess and can cause the entire sandwich to fall apart.
Low-moisture mozzarella, the kind you buy in blocks or pre-sliced at the deli counter, has been aged to remove much of that liquid. It melts into a smooth, stretchy layer that coats the chicken evenly and helps bind the sandwich together. The drier composition also means it browns slightly under the broiler, developing those appealing golden spots you see on restaurant chicken parm.
You want whole-milk low-moisture mozzarella rather than part-skim for the best flavor and melt quality. The fat content contributes to that creamy texture and rich taste that makes the cheese coating so appealing. Part-skim versions can taste rubbery and don’t melt as smoothly. Buy it in blocks and slice it yourself to get consistent ¼-inch thick pieces, or ask the deli counter to slice it fresh at that thickness.
Pre-shredded mozzarella is technically an option, but it’s not ideal. The anti-caking agents added to bagged shredded cheese prevent the strands from clumping together in the package, but these same agents interfere with smooth melting. You’ll get a grainy texture instead of that stretchy, cohesive cheese layer you want on a proper chicken parm sandwich.
Fresh mozzarella can work if you absolutely love its delicate flavor and are willing to accept wetter sandwiches.
The Best Oil Temperature for Frying Chicken Cutlets
Maintaining 350°F is the ideal temperature for frying breaded chicken cutlets because it creates that perfect balance between cooking the interior and developing a golden, crispy crust. At this temperature, the breading browns in about 3 to 4 minutes per side while the chicken reaches a safe internal temperature of 165°F without overcooking.
When oil temperature drops below 325°F, several problems occur. The breading takes longer to brown, which means the chicken spends more time in the oil absorbing fat. This creates greasy, heavy breading instead of light and crunchy coating. Lower temperatures also allow moisture from the chicken to escape into the breading layer before the crust fully sets, resulting in soggy texture. You’ll notice the chicken looks pale and the coating feels heavy rather than crisp.
Oil that’s too hot, above 375°F, causes the opposite problem. The exterior browns too quickly before the inside cooks through. You end up with dark brown or even burnt breading surrounding undercooked chicken. High temperatures can also cause the breading to separate from the meat, creating gaps where oil seeps in and makes everything greasy.
Use a thermometer to monitor oil temperature throughout the frying process. Clip-on thermometers that attach to the side of your pan work well, or use an instant-read thermometer to check periodically. When you add cold chicken to hot oil, the temperature naturally drops 25 to 50 degrees. This is why you should only fry 2 cutlets at a time in a standard 12-inch skillet. Overcrowding causes a dramatic temperature drop that’s hard to recover from.
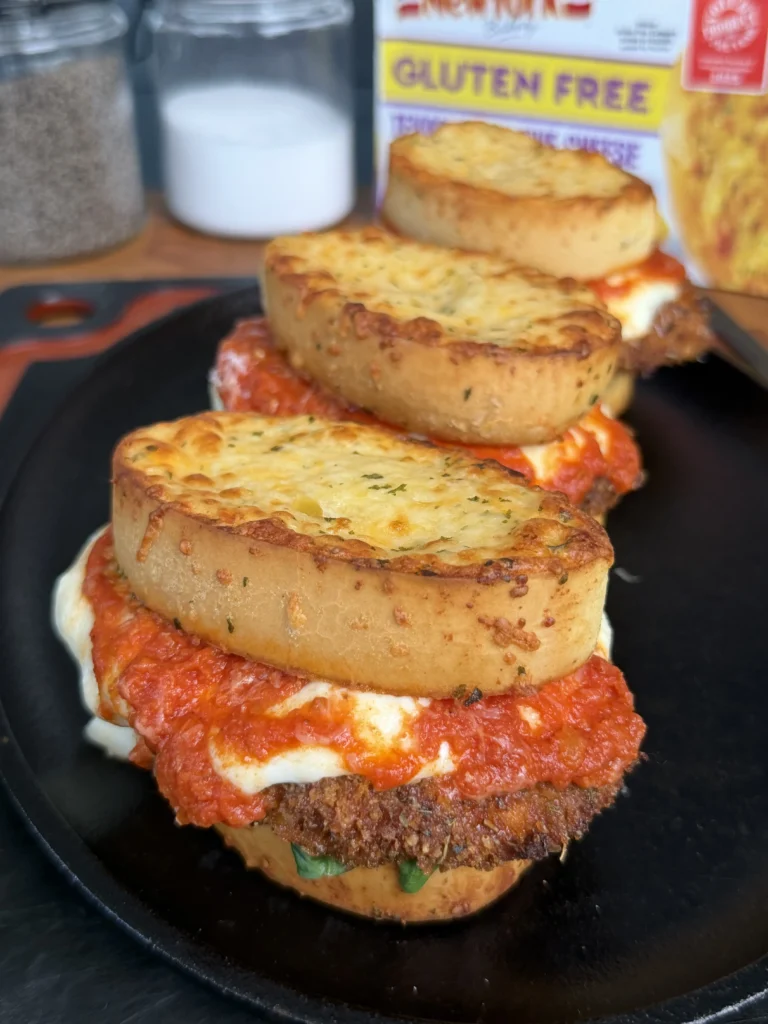
Chicken Parmesan Sandwich
Crispy Breaded Chicken, Melted Mozzarella & Rich Marinara on Toasted Italian Bread
Ingredients
For the Chicken
- 2 large boneless, skinless chicken breasts (sliced in half lengthwise to create 4 cutlets)
- 1 cup all-purpose flour
- 2 large eggs
- 1 tablespoon water
- 1½ cups Italian-seasoned breadcrumbs
- ½ cup freshly grated Parmesan cheese
- 1 teaspoon garlic powder
- 1 teaspoon onion powder
- ½ teaspoon kosher salt
- ½ teaspoon black pepper
- Neutral oil for frying (avocado or vegetable oil)
Sauce & Cheese
- 1½ cups high-quality marinara sauce (thick, not watery)
- 8 slices whole-milk mozzarella cheese
- Extra grated Parmesan cheese for finishing
Bread & Assembly
- 4 hoagie rolls or Italian sandwich rolls
- 2 tablespoons butter, softened
- 1 teaspoon garlic powder
- Fresh basil or parsley (optional, for garnish)
The secret to keeping your breading ultra-crispy under sauce is to avoid overcrowding the pan during frying. Cook only 2 cutlets at a time so the oil temperature stays at 350°F. If the oil drops below 325°F, you’ll get soggy breading instead of that restaurant-quality crunch.
Step-by-Step Instructions
Step 1: Prep and Butterfly the Chicken Breasts
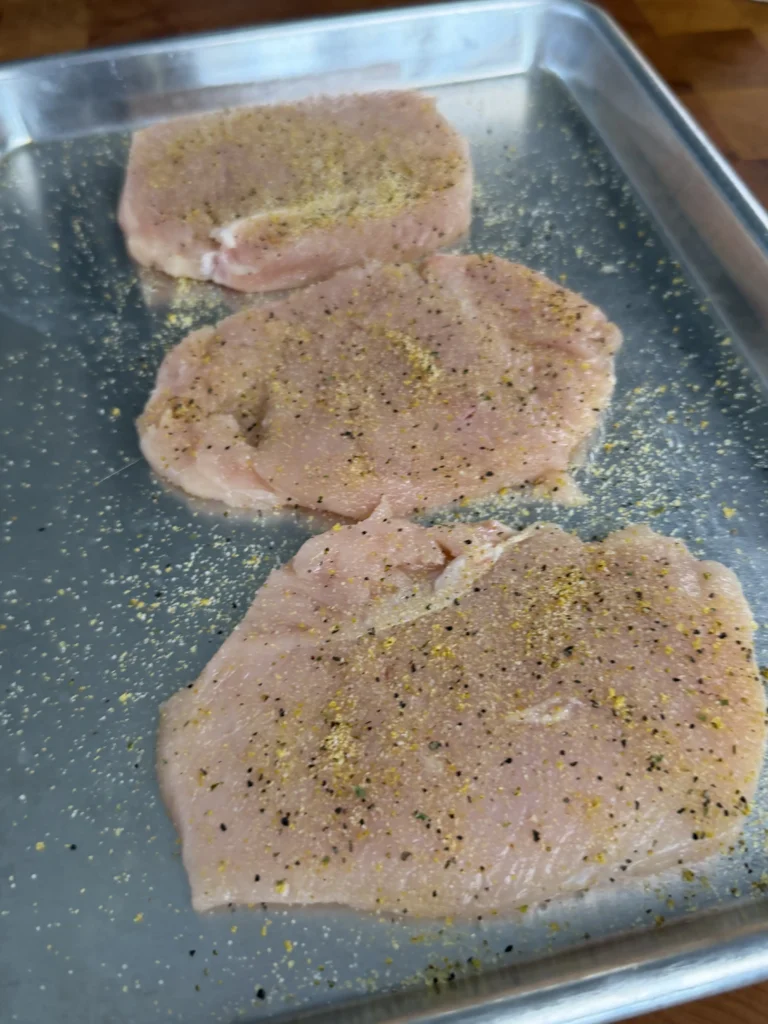
Place your chicken breasts on a clean cutting board. Hold your hand flat on top of one breast to stabilize it, then use a sharp knife to slice horizontally through the middle, creating two thin cutlets from each breast. You’re aiming for cutlets that are roughly ¼ to ⅜ inch thick. If they’re uneven, place them between two sheets of plastic wrap and use a meat mallet or heavy pan to pound them to uniform thickness.
Season each cutlet lightly with a pinch of salt and pepper on both sides. This base seasoning enhances the chicken’s natural flavor before you add the breading. Don’t over-salt at this stage since the Parmesan in your breading and the marinara sauce both contain sodium.
Set the seasoned cutlets aside while you prepare your breading station. Having evenly thin chicken ensures consistent cooking time and makes the cutlets fit perfectly in sandwich rolls.
Step 2: Set Up Your Three-Bowl Breading Station
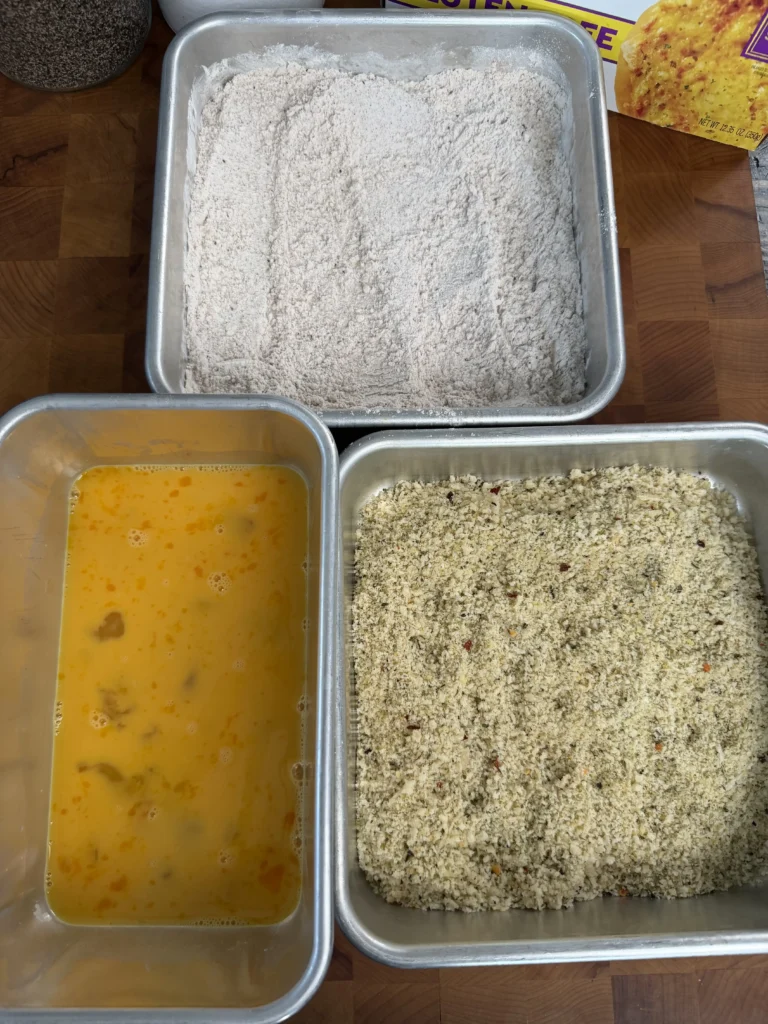
Get three shallow bowls or pie plates and arrange them in assembly-line fashion. The first bowl gets 1 cup of all-purpose flour. The second bowl needs 2 eggs whisked together with 1 tablespoon of water until smooth. The third bowl combines 1½ cups Italian-seasoned breadcrumbs, ½ cup freshly grated Parmesan, 1 teaspoon garlic powder, 1 teaspoon onion powder, ½ teaspoon salt, and ½ teaspoon black pepper. Mix the breadcrumb mixture thoroughly so the seasonings distribute evenly.
This three-step breading process creates layers that help the coating adhere properly. The flour dries the chicken surface and provides texture for the egg wash to grab onto. The egg wash acts as glue for the final breadcrumb layer. The seasoned breadcrumbs mixed with Parmesan create that golden, flavorful crust.
Keep one hand designated for dry ingredients and one for wet to avoid building up breading on your fingers. This “dry hand, wet hand” method keeps your breading station cleaner and more efficient.
Step 3: Bread the Chicken Cutlets
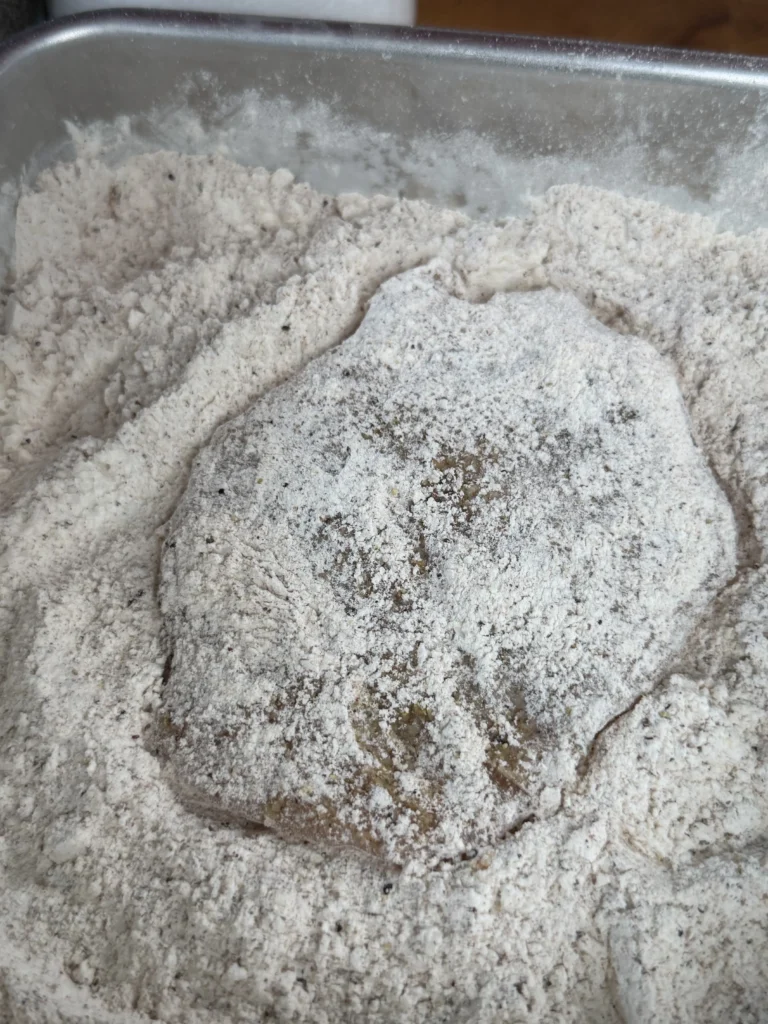
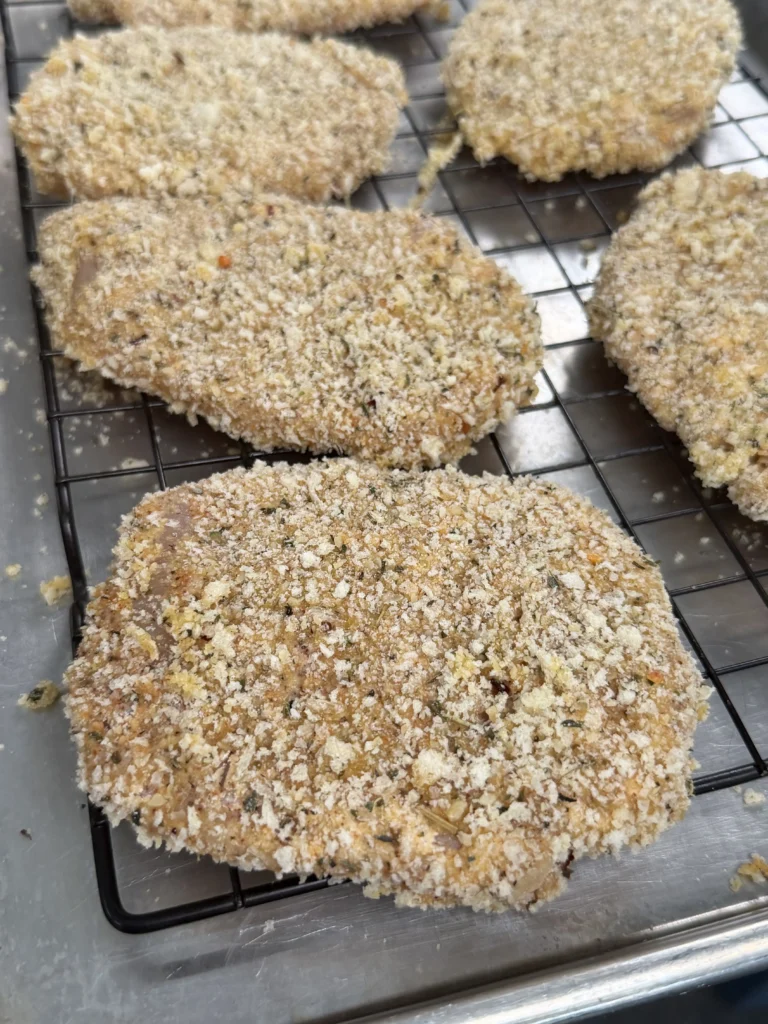
Take one cutlet and dredge it completely in flour, coating both sides and shaking off any excess. Move it to the egg wash and turn it to coat thoroughly, letting excess egg drip back into the bowl. Finally, press the cutlet firmly into the breadcrumb mixture, turning once and pressing down to ensure the breading adheres all over. Place the breaded cutlet on a clean plate or wire rack.
Repeat this process with the remaining three cutlets. The key is pressing the breadcrumbs firmly onto the chicken surface so they stick during frying. You want complete coverage with no bare spots where the chicken shows through. Pay special attention to the edges, which can lose breading more easily during cooking.
Let the breaded cutlets rest for 5 to 10 minutes before frying. This brief rest allows the breading to set and bond with the meat, which reduces the amount of coating that falls off during frying. Some cooks skip this step and go straight to the pan, but that resting period makes a noticeable difference in how well the breading stays attached.
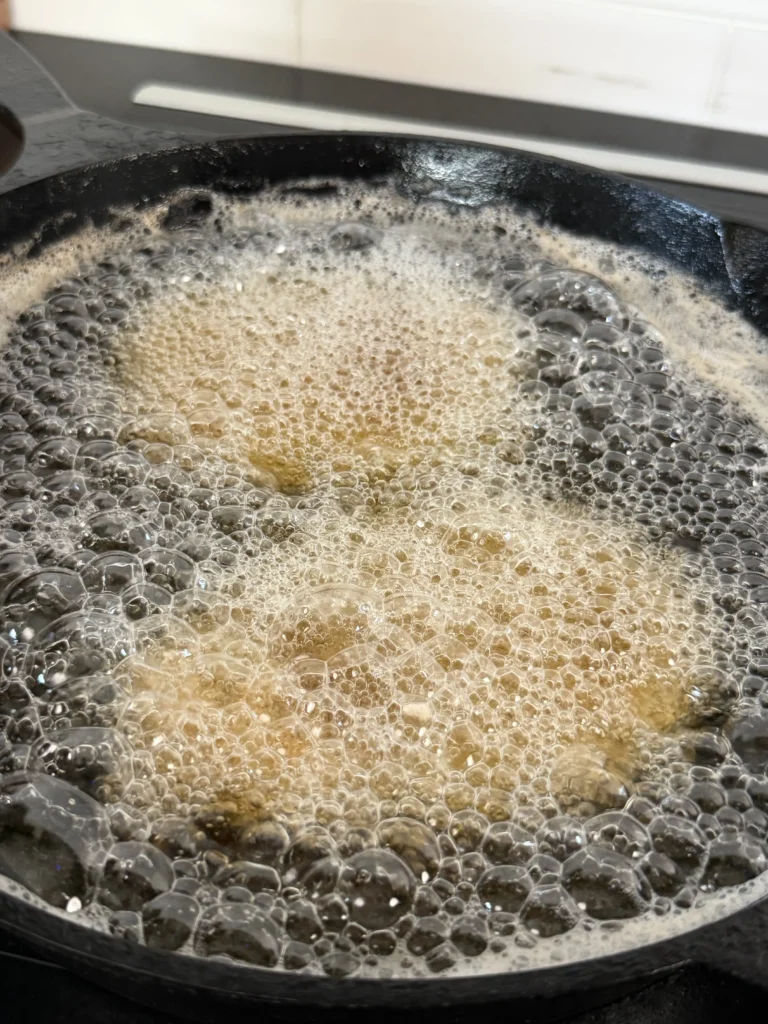
Step 4: Fry the Chicken Until Golden and Crispy
Pour neutral oil into a large skillet to a depth of ½ inch. Heat the oil over medium-high heat until it reaches 350°F on a thermometer. You can test the temperature by dropping a pinch of breadcrumbs into the oil; they should sizzle immediately and turn golden brown within 30 seconds.
Carefully add 2 chicken cutlets to the hot oil, laying them away from you to avoid splashing. Fry for 3 to 4 minutes without moving them, allowing the first side to develop a deep golden-brown crust. Flip the cutlets using tongs or a spatula and fry for another 3 to 4 minutes until the second side matches the first and the chicken reaches an internal temperature of 165°F.
Transfer the finished cutlets to a wire rack set over a baking sheet to drain. Never place fried chicken on paper towels, which trap steam and soften the breading. Let the first batch rest while you fry the remaining 2 cutlets, making sure the oil returns to 350°F before adding them.
The total frying time is 6 to 8 minutes per cutlet. You’re looking for a rich, golden-brown color and a crust that feels firm and crispy when you touch it with tongs. If the coating is browning too fast or burning, reduce your heat slightly. If it’s taking longer than 4 minutes per side to brown, increase the heat.
Step 5: Toast the Bread to Prevent Sogginess
While the chicken rests, prepare your bread. Mix 2 tablespoons of softened butter with 1 teaspoon of garlic powder until combined. Split your 4 hoagie rolls lengthwise and spread the garlic butter on the cut sides of each half.
Heat a large skillet or griddle over medium heat. Place the rolls cut-side down and toast for 2 to 3 minutes until golden brown with visible grill marks. You can also do this under your broiler, watching carefully to prevent burning. The goal is to create a crispy, slightly crunchy surface that acts as a moisture barrier.
Toasting the bread is a critical step that many people skip when making chicken parm sandwiches at home. The butter creates a waterproof layer that prevents marinara sauce from soaking into the bread immediately. Without this step, you’ll end up with soggy, falling-apart sandwiches within minutes of assembly.
Step 6: Assemble and Melt the Cheese
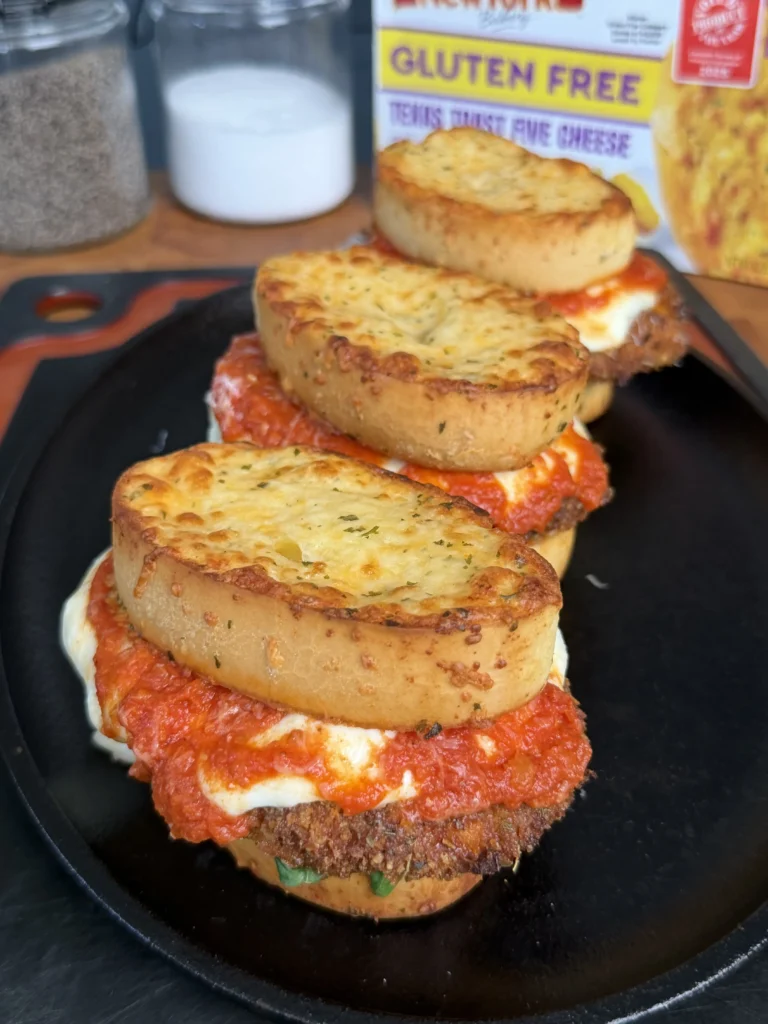
Position your oven rack about 6 inches from the broiler element and turn the broiler to high. Place the bottom halves of your toasted rolls on a baking sheet. Put one fried chicken cutlet on each roll bottom.
Spoon about ¼ cup of marinara sauce over the center of each cutlet, leaving the edges exposed so some of the crispy breading remains visible. Don’t flood the chicken with sauce; you want just enough to add flavor and moisture without making everything soggy. Lay 2 slices of mozzarella cheese over the sauce on each cutlet, overlapping them slightly to cover the surface. Sprinkle a tablespoon of grated Parmesan over the mozzarella.
Slide the baking sheet under the broiler and watch carefully. The cheese should melt and start bubbling within 1 to 2 minutes. You’re not trying to brown the cheese heavily, just melt it until it’s gooey and creates that signature cheese pull when you bite into the sandwich. Remove the pan as soon as the mozzarella is fully melted.
Step 7: Finish and Serve Immediately
Take the baking sheet out of the oven and let the assembled sandwiches cool for 30 seconds. If you’re using fresh basil or parsley, tear or chop a few leaves and scatter them over the melted cheese. Place the top halves of the toasted rolls on each sandwich.
Serve these immediately while the chicken is still hot and the breading retains maximum crispiness. The texture degrades quickly once assembled, so these are best eaten right away rather than sitting on a platter. Cut the sandwiches in half on a diagonal if desired, though this is purely for presentation since they’re already easy to pick up and eat.
The ideal chicken parmesan sandwich has layers of contrasting textures in every bite: crunchy breading, juicy chicken, tangy sauce, melted cheese, and crispy toasted bread. That combination only lasts for about 10 minutes after assembly, so encourage everyone to dig in right away.

Chicken Parmesan Sandwich
Ingredients
For the Chicken:
- 2 large boneless skinless chicken breasts (sliced in half lengthwise)
- 1 cup all-purpose flour
- 2 large eggs
- 1 tablespoon water
- 1½ cups Italian-seasoned breadcrumbs
- ½ cup freshly grated Parmesan cheese
- 1 teaspoon garlic powder
- 1 teaspoon onion powder
- ½ teaspoon kosher salt
- ½ teaspoon black pepper
- Neutral oil for frying avocado or vegetable oil
Sauce & Cheese:
- 1½ cups high-quality marinara sauce thick, not watery
- 8 slices whole-milk mozzarella cheese
- Extra grated Parmesan cheese for finishing
Bread & Assembly:
- 4 hoagie rolls or Italian sandwich rolls
- 2 tablespoons butter softened
- 1 teaspoon garlic powder
- Fresh basil or parsley optional
Instructions
- Slice chicken breasts horizontally to create 4 thin cutlets, about ¼ to ⅜ inch thick. Pound to uniform thickness if needed and season lightly with salt and pepper. Set up three bowls: one with flour, one with eggs whisked with water, and one with breadcrumbs mixed with Parmesan, garlic powder, onion powder, salt, and pepper.
- Dredge each cutlet in flour, then egg wash, then breadcrumb mixture, pressing firmly to ensure coating adheres. Let breaded cutlets rest for 5 to 10 minutes before frying.
- Heat ½ inch of neutral oil in a large skillet to 350°F. Fry cutlets 2 at a time for 3 to 4 minutes per side until deep golden brown and internal temperature reaches 165°F. Transfer to a wire rack to drain.
- Mix softened butter with garlic powder. Split hoagie rolls and spread garlic butter on cut sides. Toast cut-side down in a skillet or under broiler until golden brown, about 2 to 3 minutes.
- Preheat broiler to high. Place roll bottoms on a baking sheet and top each with a fried chicken cutlet. Spoon ¼ cup marinara over each cutlet, add 2 slices mozzarella, and sprinkle with Parmesan. Broil for 1 to 2 minutes until cheese is melted and bubbling.
- Remove from oven, garnish with fresh herbs if desired, and top with the toasted roll tops. Serve immediately while hot and crispy.
Notes
Frequently Asked Questions
Can You Make Chicken Parmesan Sandwiches Ahead of Time?
You can prep components ahead, but you should not fully assemble these sandwiches in advance. The breading loses its crispiness once it comes in contact with sauce and sits for any length of time. For make-ahead preparation, bread the chicken cutlets up to 24 hours before cooking and store them uncovered on a wire rack in the refrigerator. The uncovered storage actually helps the breading set and creates a crispier crust when you fry.
Fry the chicken up to 2 hours before serving and keep the cutlets on a wire rack at room temperature. Don’t cover them or stack them, which traps moisture and softens the breading. Have your marinara warmed, cheese sliced, and bread ready to toast. When you’re ready to serve, toast the bread, assemble the sandwiches, and broil the cheese. This assembly process only takes 5 minutes and ensures everyone gets hot, crispy sandwiches.
Some people try to fully assemble these sandwiches ahead for parties or meal prep, but the results are always disappointing. The bread becomes soggy, the breading gets soft and chewy, and you lose all the textural contrasts that make a chicken parm sandwich great. If you absolutely must prepare fully assembled sandwiches in advance, wait to add the sauce and cheese until right before serving, and reheat the breaded chicken in a 375°F oven for 5 minutes to restore some crispiness before building the sandwiches.
What’s the Best Marinara Sauce for Chicken Parmesan Sandwiches?
The best marinara for chicken parm sandwiches is a thick, well-seasoned sauce that won’t make your bread soggy. Look for jarred marinara that has a paste-like consistency when you spoon it rather than a thin, watery texture. Read the ingredient list and choose sauces with tomatoes as the first ingredient, olive oil, garlic, and herbs, avoiding ones loaded with added sugar or that taste overly sweet.
High-quality brands like Rao’s Homemade, Victoria, or DeLallo make excellent thick marinara that works perfectly for sandwiches. These premium options cost more than generic store brands but the texture and flavor difference is significant. If you’re using a thinner sauce, you can improve it by simmering uncovered for 10 to 15 minutes to reduce the liquid content and concentrate the flavors.
Making your own marinara gives you complete control over texture and seasoning. Sauté minced garlic in olive oil, add crushed tomatoes or tomato puree, season with salt, pepper, oregano, and basil, then simmer for 20 to 30 minutes until thickened. Homemade sauce can be made several days ahead and actually improves in flavor as it sits in the refrigerator.
Whatever sauce you choose, heat it before assembling your sandwiches. Warm sauce melts the cheese faster under the broiler and provides better flavor contrast with the crispy chicken. Cold sauce takes longer to heat through and can cool down the fried chicken, affecting the overall eating experience.
Should You Pound Chicken Breasts Flat for Chicken Parm Sandwiches?
You should slice chicken breasts horizontally rather than pounding them completely flat because this technique gives you better control over thickness and creates more servings from each breast. Most chicken breasts are thick on one end and thin on the other, making them difficult to cook evenly when left whole. Slicing them horizontally through the middle creates two cutlets from each breast, giving you 4 portions from 2 breasts.
After slicing, you may need to do some light pounding if the cutlets are still uneven. Place the cutlet between two sheets of plastic wrap and use a meat mallet or the bottom of a heavy pan to gently pound any thick spots until the entire cutlet is ¼ to ⅜ inch thick. This uniform thickness ensures the chicken cooks through in the same amount of time and fits properly in sandwich rolls.
Avoid pounding the chicken too thin, which some recipes recommend. Ultra-thin cutlets like you’d use for piccata or schnitzel cook too fast for proper breading development and can become dry and tough. They also tend to curl up during frying and don’t provide enough substance in the sandwich. The ¼ to ⅜ inch thickness gives you juicy chicken with a good chicken-to-bread ratio in each bite.
If you have particularly large chicken breasts that are very thick even after butterflying, you might need to cut them into smaller pieces before pounding. The goal is cutlets that fit nicely in your sandwich rolls without hanging over the edges dramatically. Pieces that are roughly 4 to 5 inches wide work perfectly for standard hoagie or sub rolls.
Can You Bake Instead of Fry Chicken Parmesan Sandwiches?
You can bake breaded chicken cutlets instead of frying them, but the texture won’t match the crispy, golden crust you get from pan-frying. Baked versions tend to have softer breading with less color development, though they’re certainly healthier with significantly less oil. If you want to go the baked route, bread the cutlets as directed, place them on a wire rack set over a baking sheet, spray or brush them lightly with oil, and bake at 425°F for 15 to 20 minutes, flipping halfway through.
Air frying is a better alternative to traditional baking because it produces crispier results closer to pan-frying. Bread the cutlets normally, spray them lightly with cooking oil, and air fry at 400°F for 10 to 12 minutes, flipping once at the 6-minute mark. The circulating hot air creates good browning and a reasonably crispy exterior, though it still won’t match the deep golden color and shatteringly crisp texture of oil-fried chicken.
The main advantage of frying is the Maillard reaction, which occurs when proteins and sugars brown at high temperatures in the presence of fat. This reaction creates hundreds of flavor compounds that you simply can’t replicate in an oven or air fryer. Fried chicken tastes richer and more complex, with that characteristic savory depth that makes restaurant chicken parmesan sandwiches so craveable.
If you’re committed to avoiding frying for health reasons, accept that your sandwiches will taste different and adjust your expectations accordingly. Focus on other elements like high-quality marinara, good cheese, and properly toasted bread to compensate for the less impressive breading. Some people prefer the lighter texture of baked versions, finding them less heavy and greasy than traditional fried preparations.
How Do You Reheat Chicken Parmesan Sandwiches Without Making Them Soggy?
Reheating fully assembled chicken parmesan sandwiches is challenging because the bread and breading both absorb moisture during storage, but you can restore some texture using the right method. Never microwave these sandwiches, which steams the breading and makes everything soft and rubbery. Instead, disassemble the sandwich and reheat the components separately for best results.
Take the chicken cutlet out of the refrigerator 15 to 20 minutes before reheating to bring it closer to room temperature. Place the cutlet on a wire rack set over a baking sheet and put it in a 375°F oven for 8 to 10 minutes. The dry heat and air circulation help re-crisp the exterior while warming the inside. If the chicken already has sauce and cheese on it, that’s fine, though the breading won’t get quite as crispy as if it were bare.
An air fryer works even better for reheating if you have one. Place the chicken cutlet in the air fryer basket and heat at 350°F for 5 to 7 minutes. The concentrated hot air does a remarkable job of restoring crispiness to breading that’s softened in the refrigerator. Again, this works whether the chicken is plain or already topped with sauce and cheese.
Once the chicken is hot, toast fresh bread with garlic butter and reassemble the sandwich with warmed marinara and fresh cheese if needed. This approach takes more effort than just reheating a fully assembled sandwich, but the texture difference is dramatic. The reality is that chicken parm sandwiches are meant to be eaten fresh, and reheated versions never match the quality of freshly made ones, regardless of the method you use.
If you’re looking for more recipes like this recipe, click the link! Check out all of our grilling recipes here for more steak, seafood, and BBQ favorites that are perfect for your next cookout.
COMMON ITEMS USED IN THESE RECIPES
Hasty Bake Charcoal Grill and Smoker
Knitted Gloves
Food Processor
Cast Iron Skillet
Meater +
Upgrade Your Meat Game with Grill Nation x Linz Heritage Angus
If you really want to take your grilling and cooking to the next level, you need to check out our collaboration with Linz Heritage Angus. We’ve partnered with them to bring you some of the best beef you can get your hands on.
Linz Heritage Angus isn’t your typical grocery store meat. These guys are the real deal – they raise their cattle the right way, and you can taste the difference in every bite. We’re talking about beef that’s been dry-aged to perfection, with marbling that makes your mouth water just looking at it.
Check out these premium cuts that’ll change how you think about beef:
Premium Ribeye Steaks – Perfect for special occasions
Dry-Aged Beef Selection – Take your grilling to the next level
Ground Beef & Burger Blends – The foundation of great BBQ