Chili Loaded Baked Potatoes
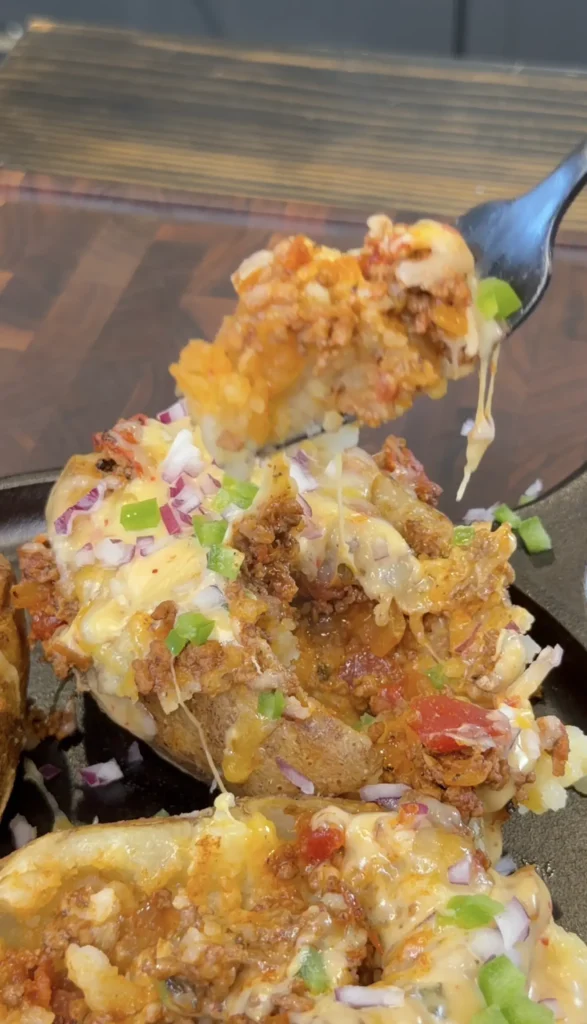
Chili loaded baked potatoes are large russet potatoes scrubbed clean, pierced with a fork, rubbed with olive oil and seasonings, then wrapped loosely in foil and grilled over indirect heat at 375°F to 425°F for 60 to 75 minutes until they reach 205°F to 210°F internal temperature. You slice them lengthwise, fluff the insides with a fork, then load them with shredded cheddar cheese and hot beef chili. Return them to the grill for 5 minutes to melt the cheese. Top with sour cream, crispy bacon, green onions, and jalapeños before serving.
The grilling method creates superior flavor compared to oven-baked potatoes. The indirect heat cooks the potatoes evenly while adding subtle smoke. Removing the foil and placing potatoes over direct heat for 2 to 3 minutes per side at the end creates crispy, charred skins. This texture contrast between fluffy interior and crispy exterior makes grilled baked potatoes more interesting than standard oven versions. The grill also keeps your kitchen cool during summer cookouts.
These BBQ loaded potatoes work equally well in the oven at 425°F for 50 to 60 minutes when outdoor grilling isn’t possible. The process is identical except you skip the smoke flavor and direct-heat crisping.
Why Russet Potatoes Are Essential for Loaded Baked Potatoes
Russet potatoes create the best chili loaded baked potatoes because their high starch content produces fluffy, light interior texture. When baked to 205°F to 210°F internal temperature, russet potato starches gelatinize completely. The cells separate easily. This creates that characteristic fluffy texture when you fluff the insides with a fork. Waxy potatoes like Yukon Gold or red potatoes have lower starch content. They stay dense and creamy rather than fluffy.
The thick skin on russet potatoes also holds up better to grilling and loading. Russet skins are tough enough to support heavy toppings without tearing. When crisped over direct heat, they become substantial and crunchy. Thinner-skinned potatoes can tear when you slice them open. The structural integrity of russet skins makes them ideal for loaded potato applications.
Russet potatoes also have neutral flavor that doesn’t compete with toppings. The potato serves as base for chili, cheese, sour cream, and bacon. Russets let these bold flavors shine. Yukon Gold potatoes have buttery flavor that can clash with savory chili. Red potatoes taste slightly sweet. Russets provide blank canvas.
The size of russet potatoes matters for this recipe. Look for large russets weighing 10 to 12 ounces each. Smaller potatoes don’t hold enough chili and toppings. Larger potatoes take too long to cook through. The 10 to 12 ounce size hits the sweet spot for cooking time and portion size.
Russets are also widely available and affordable. You can find them at any grocery store year-round. This makes the recipe accessible. You don’t need to search for specialty potatoes. Standard russets from the produce section work perfectly.
How Grilling Develops Better Flavor Than Oven Baking
Grilling BBQ loaded potatoes over indirect heat develops superior flavor because the potatoes absorb subtle smoke during the 60 to 75 minute cook time. Even wrapped in foil, trace amounts of smoke penetrate. This creates background smoke flavor that complements the chili and toppings. Oven-baked potatoes have no smoke character. They taste one-dimensional in comparison.
The direct heat finish after removing foil creates charred, crispy skins that oven baking can’t replicate. Placing the cooked potatoes over hot coals for 2 to 3 minutes per side chars the skins. This adds toasted, slightly bitter notes that balance the rich toppings. The Maillard reaction on the potato skin creates complex flavors. Oven-baked skins, even when crisped under the broiler, lack this depth.
Temperature fluctuations on the grill also improve texture. As you turn the potatoes every 20 minutes, different surfaces get varying heat exposure. This creates slight variation in the skin texture. Some areas are more crispy. Others are slightly softer. This textural variety is more interesting than uniformly baked oven potatoes.
Grilling also keeps your kitchen cool. During summer BBQ season, running the oven at 425°F for an hour heats up your house. Grilling moves the heat production outdoors. You can cook the potatoes while grilling other items. The efficiency of cooking multiple components on one heat source saves time and energy.
The indirect heat setup on a grill mimics convection oven cooking but with added benefits. Hot air circulates around the foil-wrapped potatoes. They cook evenly from all sides. The grill’s ambient temperature (375°F to 425°F) is perfect for potato baking. Lower temperatures take too long. Higher temperatures risk burning the foil.
What Makes Thick Chili Better for Loaded Potatoes
Thick chili works better for chili cheese baked potatoes because it stays on top of the potato rather than running off. Watery chili pools at the bottom of the plate. It makes the potato skin soggy. The chili should be spoonable but not runny. It should cling to the fluffy potato interior when you scoop a bite.
The ideal consistency is like thick stew. When you lift a spoonful, it should move slowly and maintain its shape. If it drips quickly or spreads thin, it’s too watery. If it’s so thick you need to scrape it from the spoon, it’s too thick. Somewhere between these extremes is perfect.
You can thicken thin chili several ways. Simmer it uncovered for 15 to 20 minutes. The excess water evaporates. Stir frequently to prevent sticking. The chili reduces and concentrates. Another method is mashing some of the beans against the pot side. The released starches naturally thicken the liquid.
Adding tomato paste also thickens chili effectively. Stir in 2 to 3 tablespoons of tomato paste. Simmer for 5 minutes. The paste adds body without changing flavor significantly. It also deepens the color to rich, dark red.
Cornstarch slurry provides quick thickening. Mix 1 tablespoon cornstarch with 2 tablespoons cold water. Stir into simmering chili. It thickens within 2 minutes. This method works well when you’re short on time. The cornstarch doesn’t affect flavor.
The ratio of liquid to solids in chili matters. Chili for loaded potatoes should have more meat and beans than sauce. You want each bite to have substantial chunks. Too much liquid dilutes the chili flavor. It also creates messy eating experience.
Why 205°F to 210°F Internal Temperature Is Critical
Grilled baked potatoes must reach 205°F to 210°F internal temperature for optimal texture. At this temperature range, the potato starches fully gelatinize. The cells separate completely. This creates light, fluffy interior that pulls apart easily with a fork. Lower temperatures produce gummy, dense texture.
Between 185°F and 200°F, potatoes are technically safe to eat but not perfectly fluffy. The starches are partially gelatinized. Some cells remain intact. The texture is acceptable but not ideal. The potato feels slightly heavy rather than light and airy.
Above 210°F, potatoes start drying out. Extended cooking evaporates too much moisture. The flesh becomes dry and mealy rather than fluffy and moist. The 205°F to 210°F window delivers perfect balance of fluffiness and moisture.
Using an instant-read thermometer takes the guesswork out of doneness. Insert the thermometer into the thickest part of the potato through the foil. Avoid touching the thermometer to the grill grate. Read the temperature quickly to minimize heat loss.
The knife test provides alternative doneness check. Insert a thin knife or skewer into the center. It should slide in with almost no resistance. The potato should feel soft throughout. Significant resistance indicates the potato needs more time.
Potatoes continue cooking slightly after removal from heat. This carryover cooking adds 2 to 5 degrees. If you pull potatoes at 203°F, they’ll reach 205°F to 208°F during resting. This carryover prevents overcooking while ensuring proper doneness.
Chili Loaded Baked Potatoes
Grilled or Oven-Baked with Beef Chili & Cheese
Ingredients
Potatoes
- 4 large russet potatoes
- 2 tablespoons olive oil
- 1½ teaspoons kosher salt
- 1 teaspoon black pepper
- 1 teaspoon garlic powder (optional)
For the Chili
- 2 cups beef or turkey chili (homemade or store-bought)
- ½ cup beef broth (optional for thinning)
For the Toppings
- 1½ cups shredded cheddar or Colby Jack cheese
- ½ cup sour cream
- ¼ cup chopped green onions
- ¼ cup crispy bacon bits
- Sliced jalapeños (optional)
- Hot sauce (optional)
After wrapping potatoes in foil for the main bake, remove the foil and place them over direct heat for 2 to 3 minutes per side. This final crisping step creates restaurant-quality crispy skins with smoky char. The foil-wrapped bake makes the inside fluffy. The direct heat finish makes the outside crispy. This two-step method delivers the best texture contrast between creamy interior and crunchy exterior.
Step-by-Step Instructions
Step 1: Prepare the Potatoes
Scrub 4 large russet potatoes under running water to remove dirt. Use a vegetable brush to clean thoroughly. Pat the potatoes completely dry with paper towels or a clean kitchen towel. Moisture on the surface prevents the oil and seasonings from adhering properly.
Pierce each potato 5 to 6 times with a fork. Poke all the way around the potato, not just one side. These holes allow steam to escape during cooking. Without holes, potatoes can explode from built-up steam pressure.
Rub each potato with about 1½ teaspoons olive oil. Coat the entire surface. The oil helps seasonings stick and promotes crispy skin development. It also prevents the foil from sticking to the potato surface.
Season all sides of each potato generously with kosher salt, black pepper, and garlic powder if using. The total seasoning is 1½ teaspoons salt and 1 teaspoon pepper divided among 4 potatoes. Press the seasonings into the oil so they adhere.
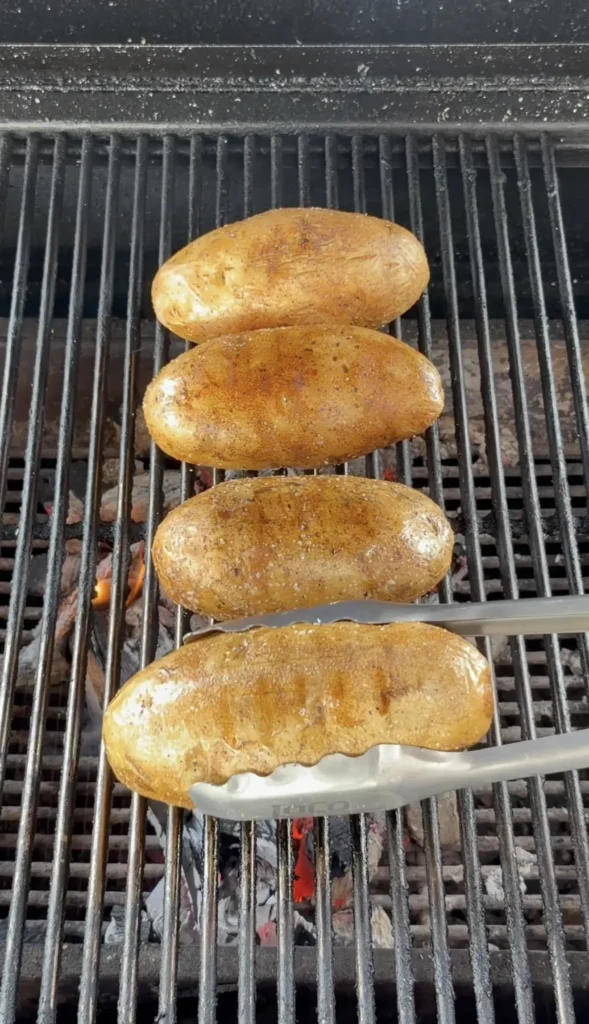
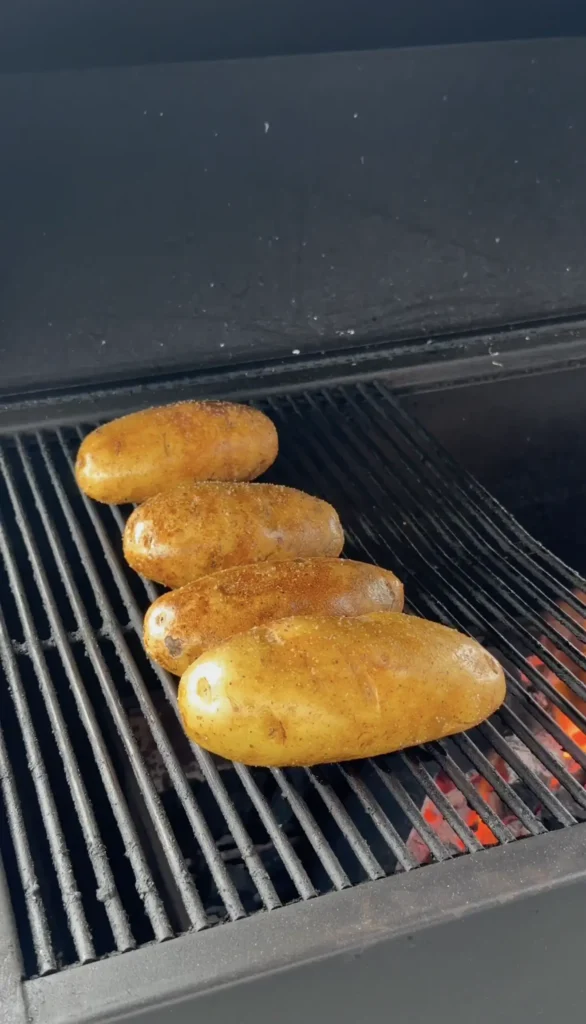
Step 2: Grill the Potatoes (Grill Method)
Set up your grill for indirect heat. For charcoal grills, push coals to one side. For gas grills, light burners on one side only. Target temperature is 375°F to 425°F in the indirect zone.
Wrap each seasoned potato loosely in aluminum foil. Don’t wrap too tightly. Leave some air space around the potato. This allows heat circulation while trapping steam.
Place the foil-wrapped potatoes on the indirect heat side of the grill. Close the lid. The ambient heat cooks the potatoes without direct flame contact.
Cook for 60 to 75 minutes, turning every 20 minutes. Rotate the potatoes to ensure even cooking. Check the grill temperature each time you turn them. Adjust vents or burner settings to maintain 375°F to 425°F.
Check for doneness at the 60-minute mark. Carefully open one foil packet slightly. Insert an instant-read thermometer into the center of the potato. It should read 205°F to 210°F. If not there yet, re-wrap and continue cooking.
Step 3: Crisp the Skins (Optional but Recommended)
When the potatoes reach target temperature, carefully remove the foil. The potatoes and steam are extremely hot. Use tongs and oven mitts. Discard the foil.
Place the unwrapped potatoes directly over the hot coals or direct flame. Grill for 2 to 3 minutes per side. You want char marks and crispy, slightly blistered skin. Watch carefully to prevent burning.
The direct heat crisps the exterior while the interior stays fluffy. This texture contrast is what makes grilled baked potatoes superior to oven versions. After crisping all sides, remove from direct heat.
Step 4: Bake the Potatoes (Oven Method)
Preheat your oven to 425°F. Place an oven rack in the center position. Put a baking sheet on a lower rack to catch any drips.
Prepare the potatoes exactly as described in Step 1. For crispy skins, place unwrapped potatoes directly on the oven rack. For softer skins, wrap in foil first.
Bake for 50 to 60 minutes until the internal temperature reaches 205°F to 210°F. Unwrapped potatoes may need closer to 60 minutes. Foil-wrapped potatoes cook slightly faster, around 50 to 55 minutes.
Check doneness by inserting an instant-read thermometer through the top of the potato. If you want extra crispy skins on oven-baked potatoes, remove them at 205°F and broil for 2 to 3 minutes. Watch constantly under the broiler.
Step 5: Prepare the Chili
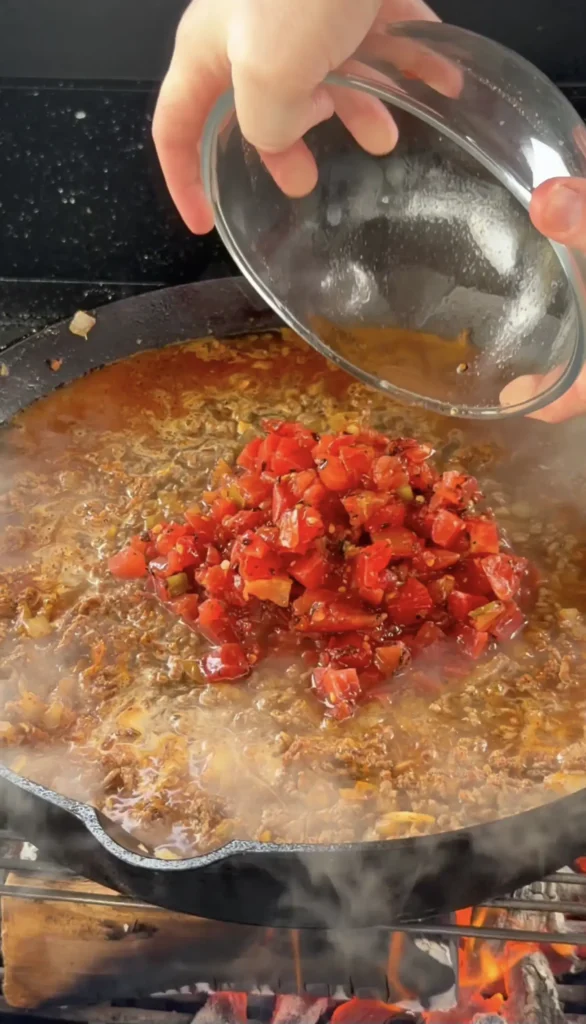
While the potatoes cook, heat 2 cups of beef or turkey chili in a saucepan over medium-low heat. If using homemade chili, you likely already have the right consistency. If using canned or store-bought chili, it may need thickening.
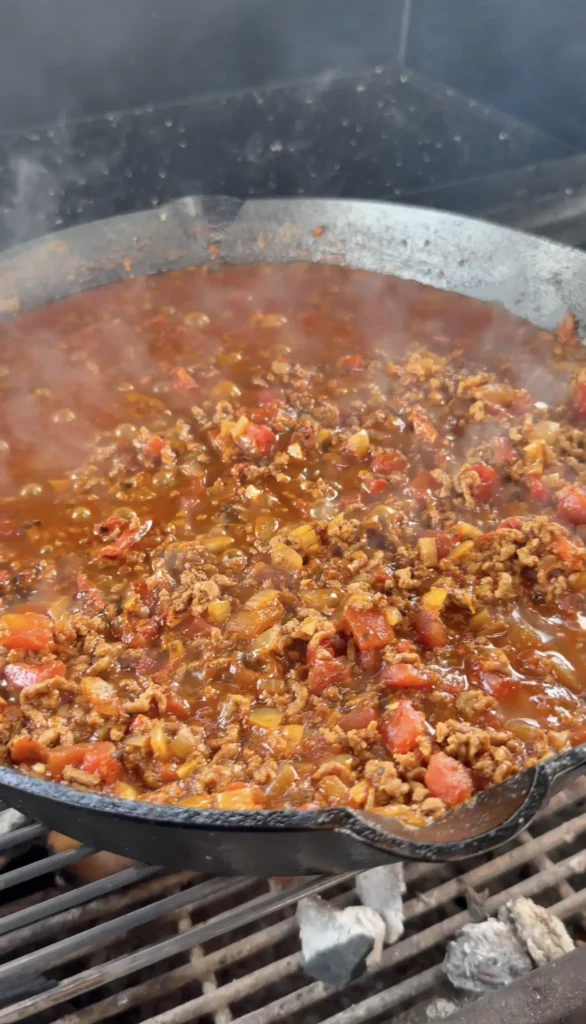
Simmer the chili uncovered for 10 to 15 minutes, stirring occasionally. The chili should reduce and thicken. It should coat a spoon when you lift it. If it’s too thick, add beef broth 2 tablespoons at a time until you reach desired consistency.
Keep the chili warm over low heat while finishing the potatoes. You want steaming hot chili for assembly. Cold chili won’t melt cheese properly and creates disappointing eating experience.
Step 6: Load the Potatoes (First Stage)
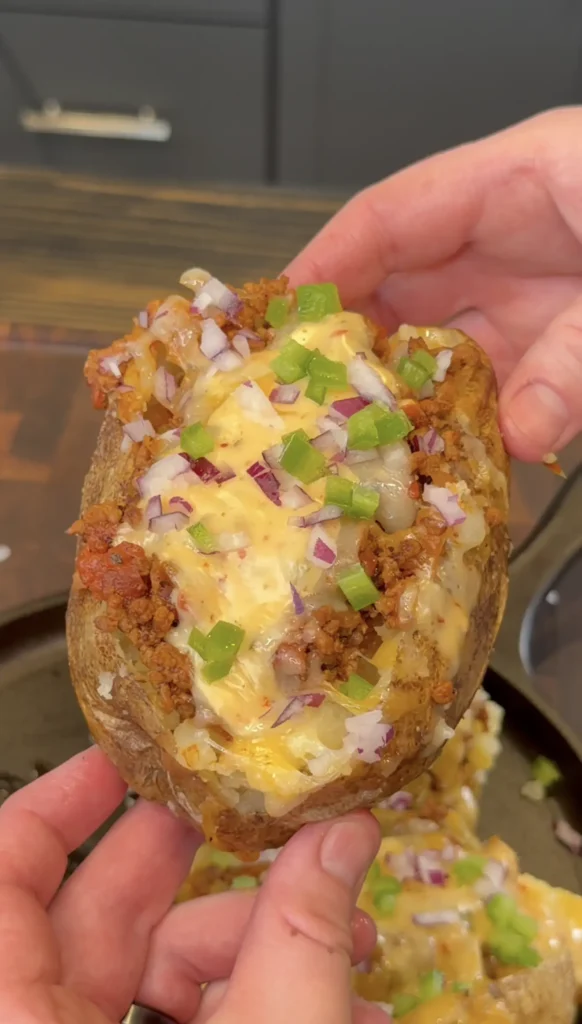
Using a sharp knife, slice each potato lengthwise down the center. Don’t cut all the way through. Leave the bottom intact. The potato should open like a book.
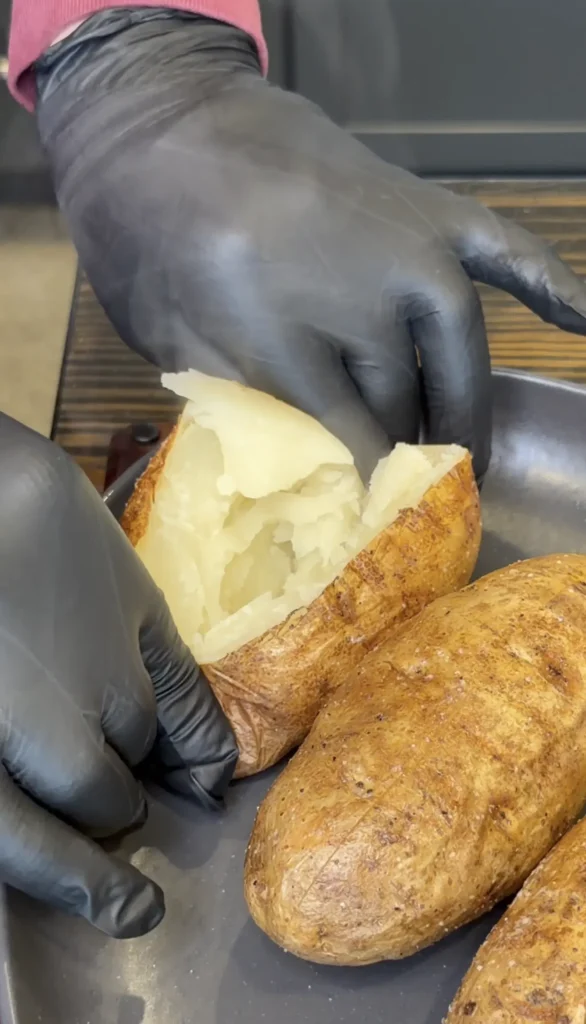
Using a fork, fluff the inside of each potato. Scrape and pull the flesh to create fluffy, separated interior. This opens up space for toppings to nestle in.
Optional but delicious: add a pat of butter to each fluffed potato. The butter melts into the hot potato flesh and adds richness.
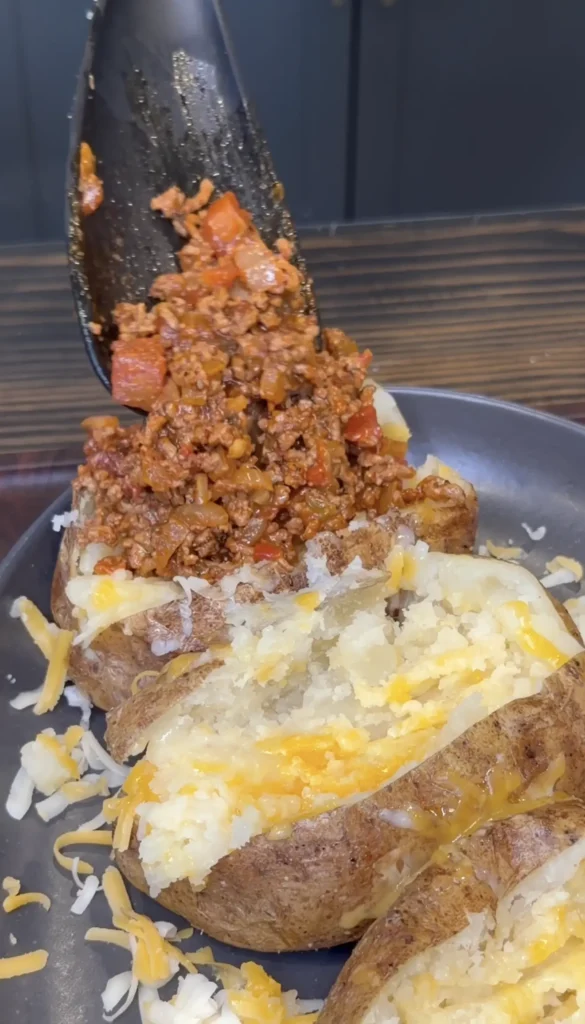
Immediately sprinkle shredded cheddar or Colby Jack cheese over the hot potato interior. Use about ⅓ cup cheese per potato. The residual heat starts melting the cheese.
Spoon ½ cup hot chili over the cheese on each potato. The chili should be steaming. Spread it evenly so it covers most of the potato surface. Some cheese should still be visible around the edges.
Step 7: Melt and Finish
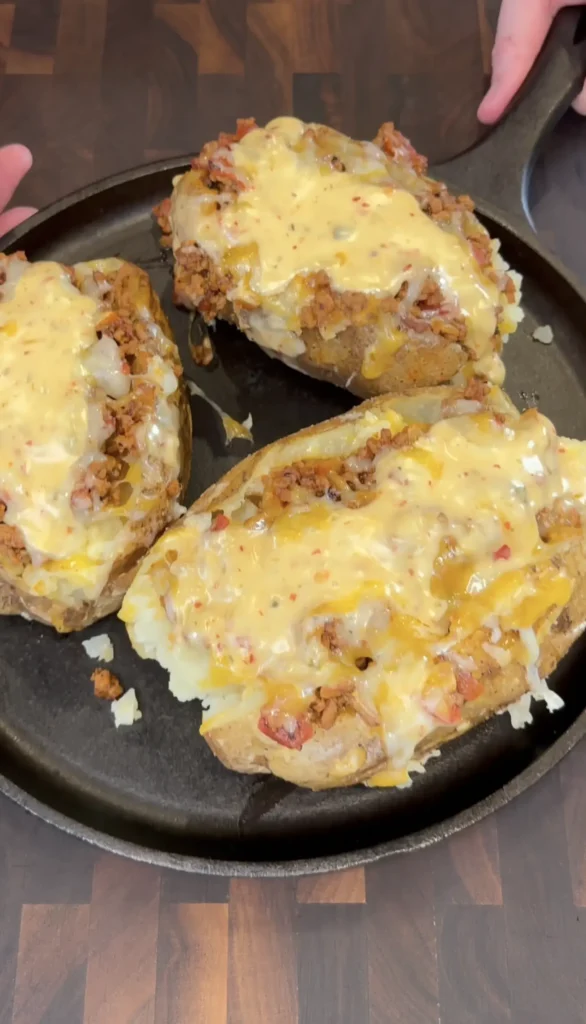
Return the loaded potatoes to the grill (on the indirect heat side) or to the oven. Cook for 5 to 7 minutes until the cheese is fully melted and bubbly. The chili should be hot throughout.
For grill method, close the lid. For oven method, you can leave them uncovered. The brief heating melds all the hot components together.
Remove the potatoes from heat. Top each potato with 2 tablespoons sour cream, 1 tablespoon bacon bits, 1 tablespoon chopped green onions, and jalapeños if using.
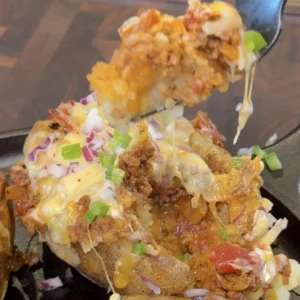
Serve immediately while hot. Provide hot sauce on the side for those who want extra heat. These chili loaded baked potatoes are best eaten fresh when the cheese is melted and the potato is steaming.
Chili Loaded Baked Potatoes
Equipment
- Grill or Oven
- Aluminum Foil
- Instant-Read Thermometer
- Tongs
Ingredients
For the Potatoes
- 4 large russet potatoes
- 2 tablespoons olive oil
- 1 1/2 teaspoons kosher salt
- 1 teaspoon black pepper
- 1 teaspoon garlic powder optional
For the Chili
- 2 cups beef or turkey chili homemade or store-bought
- 1/2 cup beef broth optional for thinning
For the Toppings
- 1 1/2 cups shredded cheddar or Colby Jack cheese
- 1/2 cup sour cream
- 1/4 cup chopped green onions
- 1/4 cup crispy bacon bits
- sliced jalapeños optional
- hot sauce optional
Instructions
- Grill Method:Prepare potatoes: Scrub potatoes clean and pat dry. Pierce each 5 to 6 times with fork. Rub with olive oil, salt, pepper, and garlic powder.
- Grill potatoes: Set up grill for indirect heat at 375-425°F. Wrap potatoes loosely in foil. Place on indirect side. Cook 60 to 75 minutes, turning every 20 minutes, until internal temp reaches 205-210°F.
- Crisp skins: Remove foil. Place over direct heat 2 to 3 minutes per side until crispy and charred.
- Heat chili: Warm chili in saucepan or cast iron on grill. Simmer 10 to 15 minutes until thick and steaming. Add beef broth if too thick.
- Load potatoes (first stage): Slice potatoes lengthwise. Fluff insides with fork. Add cheese, then hot chili.
- Melt and finish: Return to grill (indirect heat) for 5 to 7 minutes until cheese melts. Top with sour cream, bacon, green onions, and jalapeños. Serve hot.
- Oven Method:Prepare potatoes same as above. Preheat oven to 425°F. Place potatoes directly on oven rack (with tray underneath). Bake 50 to 60 minutes until 205-210°F internal temp. For extra crispy skins, broil 2 to 3 minutes. Heat chili on stovetop. Follow same assembly and final heating steps. Return to oven 5 to 7 minutes to melt cheese.
Notes
Frequently Asked Questions
Can You Use Sweet Potatoes Instead of Russet Potatoes?
Sweet potatoes work excellently for loaded baked potatoes with some adjustments. Reduce the oven temperature to 400°F and bake for 45 to 55 minutes. Sweet potatoes cook faster than russets due to higher moisture content.
The flavor profile changes significantly with sweet potatoes. Their natural sweetness pairs well with turkey chili rather than beef chili. The sweet-savory combination is more balanced. Beef chili can taste oddly sweet with sweet potato.
Pierce sweet potatoes the same way as russets before baking. They can also burst from steam pressure. The skins won’t get as crispy as russet skins but they’re still delicious. Brush with oil and season well.
Sweet potatoes provide more vitamin A and fiber than russets. They also have lower glycemic index. For health-conscious eaters, sweet potatoes offer nutritional advantages while creating equally satisfying loaded potato experience.
Can You Smoke These Potatoes at Lower Temperature?
You can smoke loaded baked potatoes at 250°F for deeper smoke flavor. The cooking time increases significantly to about 2 hours. The low temperature allows more smoke penetration. The potatoes absorb smoke gradually.
After 2 hours at 250°F, increase temperature to 375°F for the final 15 to 20 minutes. This finishing phase ensures the potatoes reach 205°F to 210°F internal temperature. The two-stage smoking creates best balance of smoke flavor and proper doneness.
The lower temperature produces slightly different texture. The skins don’t crisp as much during the main cook. You’ll definitely want to finish them over direct heat for 2 to 3 minutes per side to get crispy exterior.
Monitor grill temperature closely at 250°F. Some grills struggle to maintain very low temps. If your grill runs hot, 275°F to 300°F works as compromise. You get good smoke flavor without excessive cooking time.
What’s the Best Homemade Chili for These Potatoes?
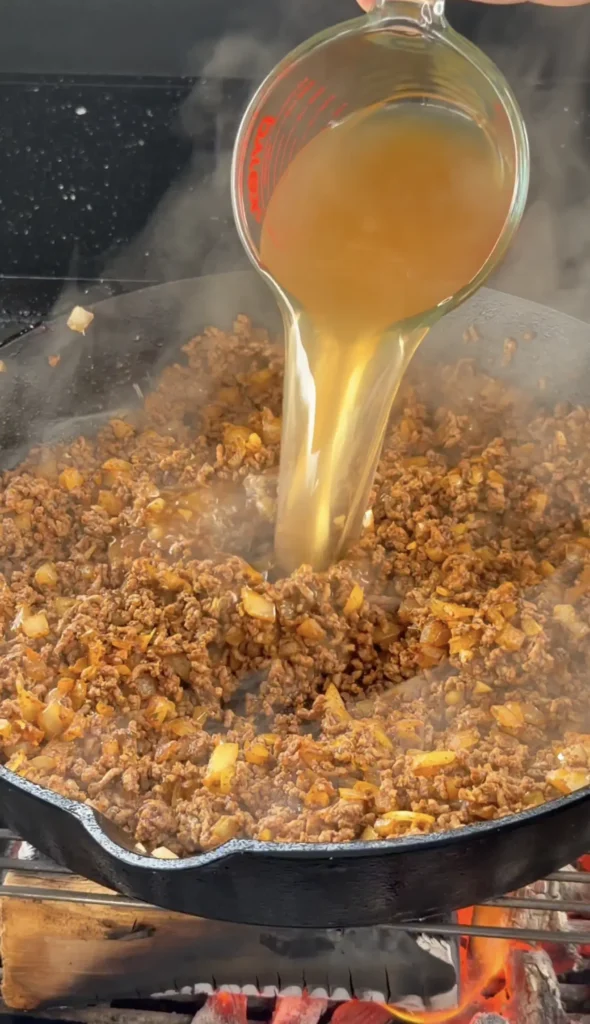
Classic beef chili with kidney beans and tomatoes works best for loaded baked potatoes. Use 80/20 ground beef for richness. Brown it well before adding other ingredients. The beef fat creates silky chili base.
Keep the bean-to-liquid ratio high for proper thickness. Too much tomato sauce or broth creates thin chili. Aim for chunky texture with visible beans and meat. The chili should mound on the potato rather than running off.
Season generously with chili powder, cumin, garlic, and onion. Don’t be shy with seasoning. The potatoes are fairly neutral. They need bold chili flavor. Add a touch of brown sugar to balance acidity from tomatoes.
Simmer homemade chili for at least 45 minutes to develop flavors. Longer is better. The chili improves significantly after an hour of gentle simmering. Make it a day ahead for even better flavor integration.
How Do You Prevent Potatoes from Exploding on the Grill?
Piercing potatoes 5 to 6 times with a fork before grilling prevents explosions. The holes allow steam to escape during cooking. Steam builds up pressure inside the potato. Without escape routes, potatoes can burst violently.
Pierce all the way around the potato, not just one side. Poke deeply enough to penetrate the flesh, not just the skin. Shallow pokes don’t provide adequate venting. Use a sturdy fork or skewer for proper depth.
The foil wrap actually increases explosion risk slightly by trapping more steam. This is why piercing is even more critical when using foil. The holes let steam escape through the foil wrapping.
If you hear hissing sounds during grilling, that’s normal. It’s steam escaping through the fork holes. Explosions are rare if you pierce properly. When they do happen, it’s usually because someone forgot to pierce the potato.
Can You Make These Potatoes Ahead for Meal Prep?
Baked potatoes are excellent for meal prep. Bake them completely up to 2 days ahead. Let them cool to room temperature, then refrigerate in an airtight container or wrapped individually in plastic wrap.
To reheat for loading, place cold potatoes in a 400°F oven for 15 to 20 minutes. They’ll heat through completely. The skins may soften during refrigeration but crisping them over direct heat after reheating restores texture.
Don’t load the potatoes until ready to eat. Assembled loaded potatoes don’t store well. The toppings make them soggy. Store plain baked potatoes separately from chili and toppings. Assemble fresh when serving.
Make a big batch of chili ahead too. It keeps for up to 5 days refrigerated or 3 months frozen. Having both components ready makes weeknight loaded potato dinners incredibly fast. Just reheat, assemble, and eat.
What Other Cheeses Work Besides Cheddar?
Pepper jack cheese adds spicy kick that pairs excellently with chili. The jalapeño pieces in pepper jack complement the overall flavor profile. It melts smoothly and provides heat without needing hot sauce.
Monterey Jack creates milder, creamier loaded potato. It melts beautifully without any graininess. Jack cheese works well if you want the chili and toppings to be the primary flavors. The cheese provides creaminess without competing.
Sharp white cheddar offers tangy alternative to standard cheddar. The sharper flavor cuts through the rich chili. White cheddar also looks different aesthetically if you want visual variety from orange cheese.
Avoid mozzarella which becomes stringy and bland. Also skip blue cheese or feta which have strong flavors that clash with chili. Stick with melty, medium-flavored cheeses that complement rather than overpower.
How Do You Know When Potatoes Are Done Without a Thermometer?
The knife test is reliable for checking potato doneness. Insert a thin knife or skewer into the thickest part of the potato. It should slide in and out with almost no resistance. The potato should feel uniformly soft.
Squeeze the potato gently through the foil using an oven mitt. It should give easily with gentle pressure. Firm potatoes need more time. The potato should feel soft but not mushy.
Time is a reasonable indicator once you’ve made these a few times. Large russets (10 to 12 ounces) consistently take 60 to 75 minutes at 375°F to 425°F. Smaller potatoes finish faster. Larger ones take longer.
The skin appearance also provides clues when you remove the foil. Properly cooked potato skin looks wrinkled and loose. The skin separates slightly from the flesh. Tight, smooth skin indicates undercooking.
Can You Use Vegetarian or Vegan Chili?
Vegetarian chili with beans and vegetables works excellently for loaded baked potatoes. Use kidney beans, black beans, and pinto beans for protein and texture. Add diced bell peppers, onions, and corn for substance.
Season vegetarian chili more aggressively than meat-based versions. Without beef’s umami, you need extra spices. Use smoked paprika, cumin, and chili powder generously. Add a dash of liquid smoke for depth.
For vegan loaded potatoes, skip the cheese and sour cream or use plant-based alternatives. Vegan cheddar shreds melt reasonably well. Cashew-based sour cream provides similar tanginess. The chili and potato remain the stars.
Nutritional yeast sprinkled over vegetarian chili adds cheesy, savory flavor without dairy. It’s a popular vegan trick. The umami from nutritional yeast compensates for missing meat and cheese flavors.
What Makes Skins Crispy in the Oven?
Baking potatoes unwrapped directly on the oven rack creates crispiest skins. The dry heat evaporates surface moisture. The skin becomes papery and crunchy. Wrapping in foil creates soft, steamed skins.
Coating potatoes generously with oil before baking helps crisping. The oil conducts heat efficiently. It also prevents moisture from softening the skin. Use about ½ tablespoon oil per potato for best results.
High oven temperature (425°F) is essential for crispy skins. Lower temperatures don’t create enough dehydration. The skin stays somewhat soft. The hot oven literally dries and crisps the exterior while cooking the interior.
For extra crispy oven-baked skins, broil for 2 to 3 minutes after baking. Place the oven rack 6 inches from the broiler. Watch carefully to prevent burning. The intense heat from above creates final crispy layer.
Can You Load Potatoes with Other Toppings Besides Chili?
Pulled pork or chopped brisket creates excellent BBQ-style loaded potato. Top with BBQ sauce, coleslaw, and crispy onions. The combination turns the potato into complete BBQ meal. Perfect for using leftover smoked meats.
Buffalo chicken with blue cheese dressing and celery makes loaded potato into bar food classic. Use shredded rotisserie chicken tossed in Frank’s RedHot. The potato provides cooling contrast to spicy chicken.
Broccoli and cheese transforms loaded potato into vegetarian comfort food. Steam broccoli florets and mix with cheese sauce. Classic combination that works beautifully. Add bacon if you want meat element.
Taco-style loaded potato uses seasoned ground beef, salsa, pepper jack cheese, sour cream, and guacamole. Basically nachos on a potato. The Mexican flavors work surprisingly well with the neutral potato base.